How To Reduce the Size of a PDF File

Are you working with monster PDF files sizes? They can take a while to load or make it difficult to send in an email. The easy solution would be to make the file smaller, but how to do that without sacrificing quality?
Fortunately, there are a couple of options to choose from. They preserve the quality of your PDF document to varying degrees, so you may need to try a couple to find the right one for you.
Keep reading to find out how to wrangle your PDF size. Don’t let large files keep you from emailing them to others. Shrink them down using one of the methods below.
Paid Programs
Can you compress your PDF files for free? Sure, but it may take a little work. If you have money to spend, or you plan on doing this often, you may want to invest in a program instead.
Use the Full Version of Adobe Acrobat
One of the easiest ways to make any changes to PDF files is to use Adobe Acrobat. You need the full version, though, to make serious edits.
Step One – Open PDF
To change your PDF size, first you need to open your document in Adobe Acrobat. If your default PDF reader is another program, you may need to specify using Adobe this time.

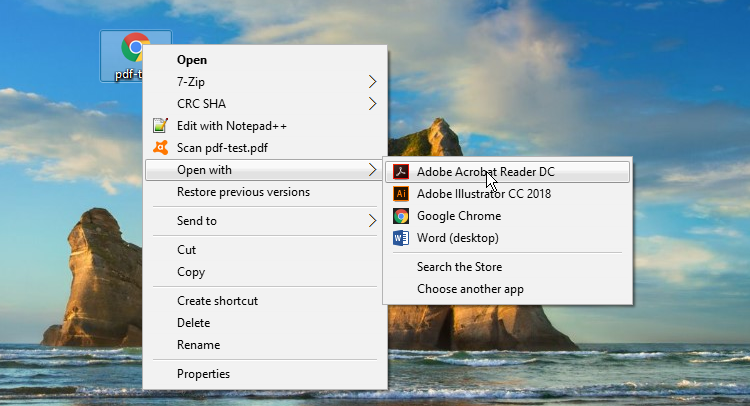
Open with Adobe by right-clicking over your PDF file icon. Go down your drop-down menu until you get to the “Open with” setting and select the Adobe program.
Step Two – Go to Tools
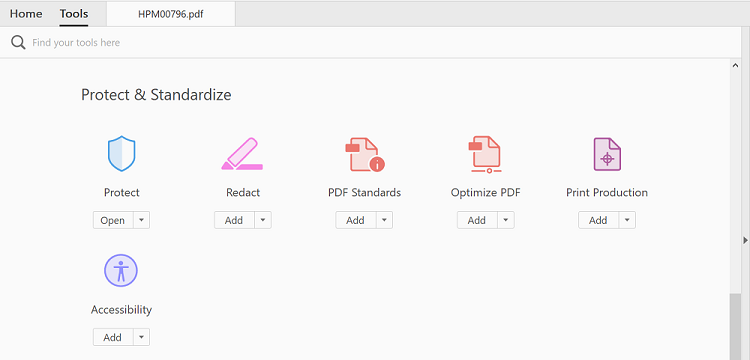
Next, go to your Tools tab. You may find it near the top of your screen. Scroll down until you see the Protect and Standardize section. Go to Optimize PDF and click on the arrow next to “Add”. From there, click on Open.

However, you need to have the full version of Adobe Acrobat Pro to do this. The free Acrobat Reader program won’t let you compress files. So if you try to click “add” using Adobe Reader it will send you to the Adobe website with an invitation to buy the full version of Acrobat.
Step Three – Optimize Your PDF
Now it’s time to compress your file. Go back to the original tab with your PDF document. You should see a new Optimize PDF toolbar. Click on Reduce File Size to pull up a new action window.

Ideally, you may want to make your file compatible with the latest versions of Adobe. In this case, it’s Acrobat 10.0 and later. But if you know your readers use an older version, you can select the one most applicable to you.
Why do you want the latest version settings? Because it compresses the file to a smaller size.

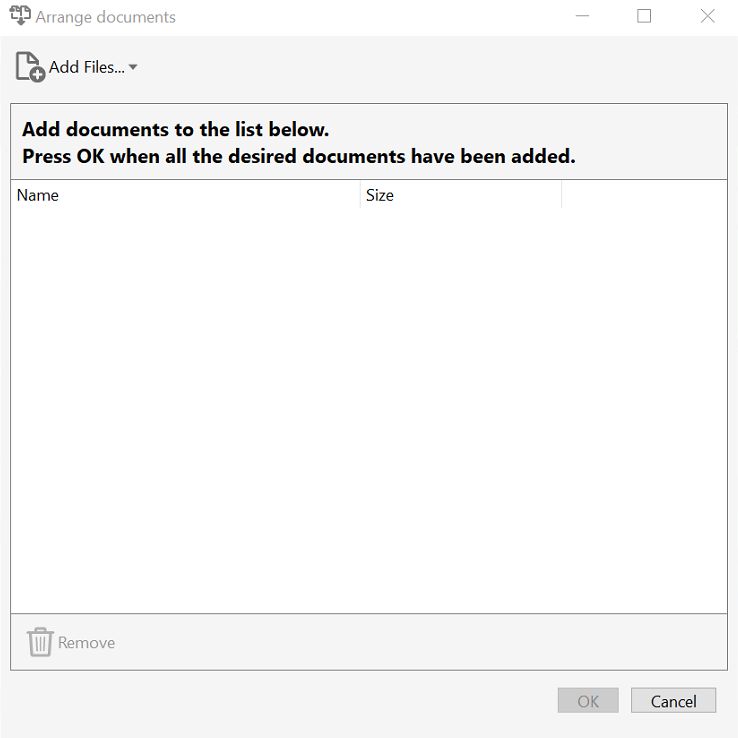
In addition, you can also add multiple files. Press the Apply to Multiple Files and add the documents you want compressed. This way you don’t need to do this process for each individual PDF.
When you’re done, click OK. Another window will pop up, allowing you to rename your new file(s).
After it processes the compression, the PDF in your Acrobat window will be the new compressed version.
Use Our Free Online Compressor
Some people don’t want or have the means to pay for the full-blown Acrobat. If that sounds familiar, you also have an option to use a free online compressor.
Step One- Load Up TechJunkie Tools
Simplye navigate to tools.techjunkie.com and select the option to Compress PDF. We offer a simple free and secure compressor
Step Two – Compress Your PDF
Upload your PDF file directly from your computer or select a source directly from Dropbox or Google Drive.
Step Three – Save Your Compressed PDF
When your file is ready, you will see an option to download the compressed file. Download it and compare file sizes
Use Preview on Mac
Mac users can use both Adobe Acrobat or free online converters. But if you have a Mac, you can also use a feature that’s already on your device.
Step One – Open the PDF in Preview App
To get to your Preview app, go to File and click Open. Select your document.
Step Two – Compress File
When you have your PDF open, go back to File and choose Export from the drop-down menu. The option you are looking for is called “Quartz Filter”.
From this new menu, choose Reduce File Size and let your app do the rest.


2 thoughts on “How To Reduce the Size of a PDF File”