How to Reduce Transparency Effects in OS X Yosemite

OS X Yosemite features a ton of transparency effects. From the Dock, to drop-down menus, to even Safari’s toolbar, Apple has made it clear that it really wants you to see what’s going on behind your active windows.
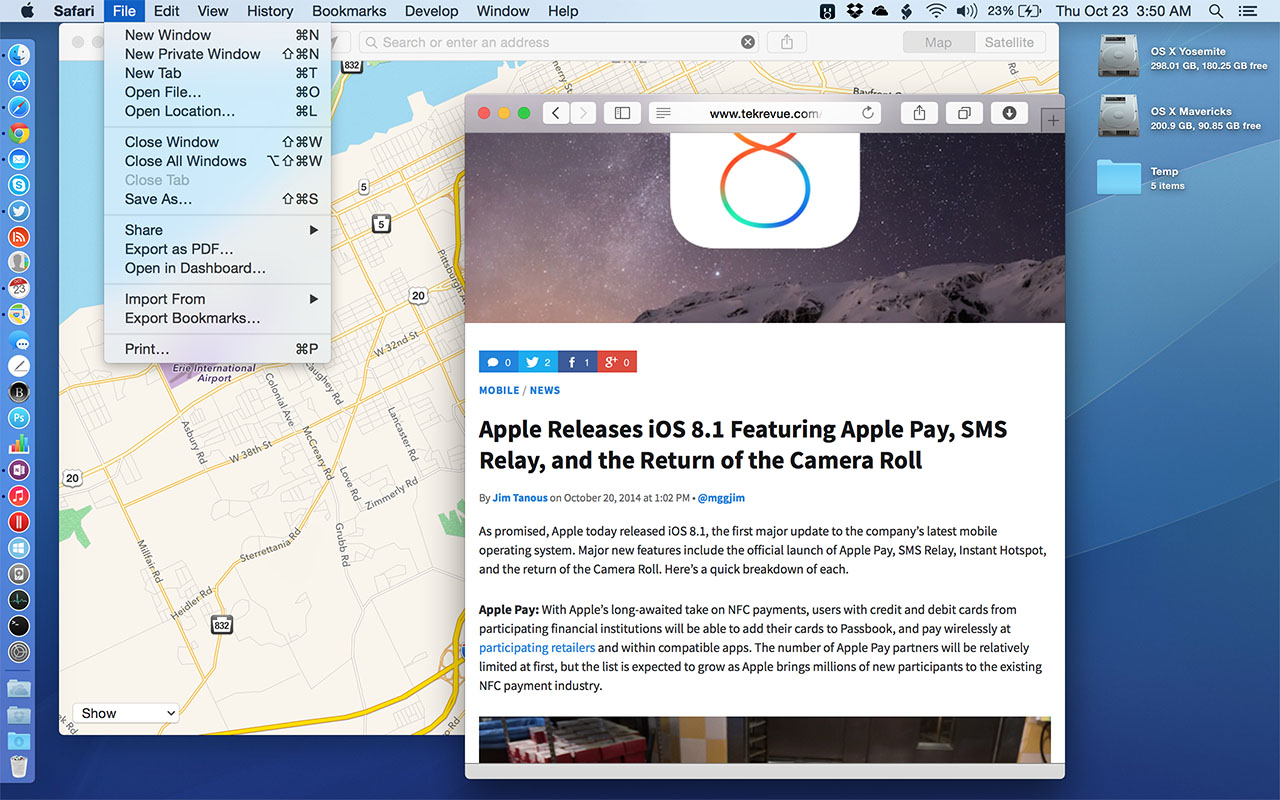
This new look is pretty cool, but many users prefer a simpler opaque design that lets them focus on their work without seeing the transparent frosted glass effect everywhere. Thankfully, Apple gives users a choice when it comes to transparency. You just need to know where to find the appropriate setting. Here’s how to reduce transparency effects in OS X Yosemite.
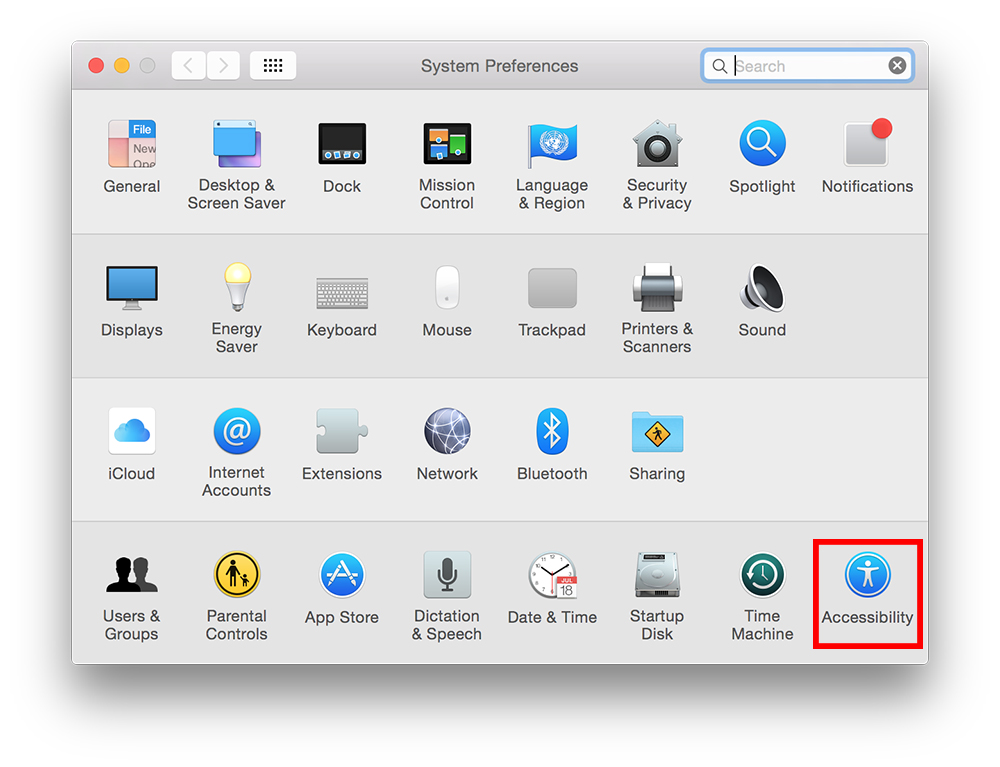
First, launch System Preferences and select Accessibility.
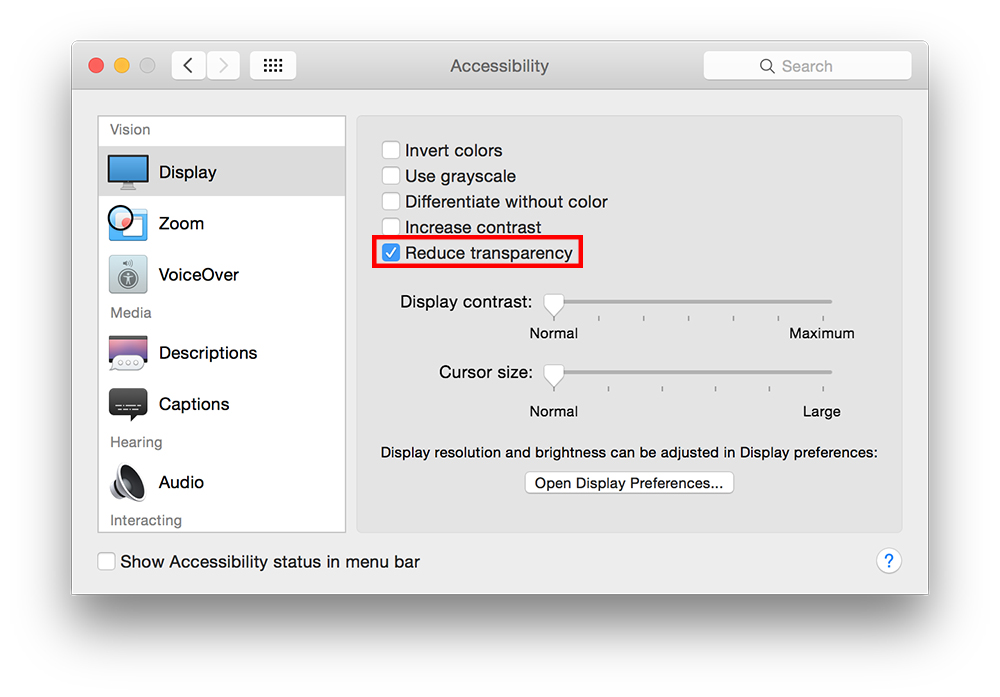
 Next, make sure you’re on the Display section on the left side of the Accessibility window. On the right side of the window, find and check the box labeled Reduce Transparency.
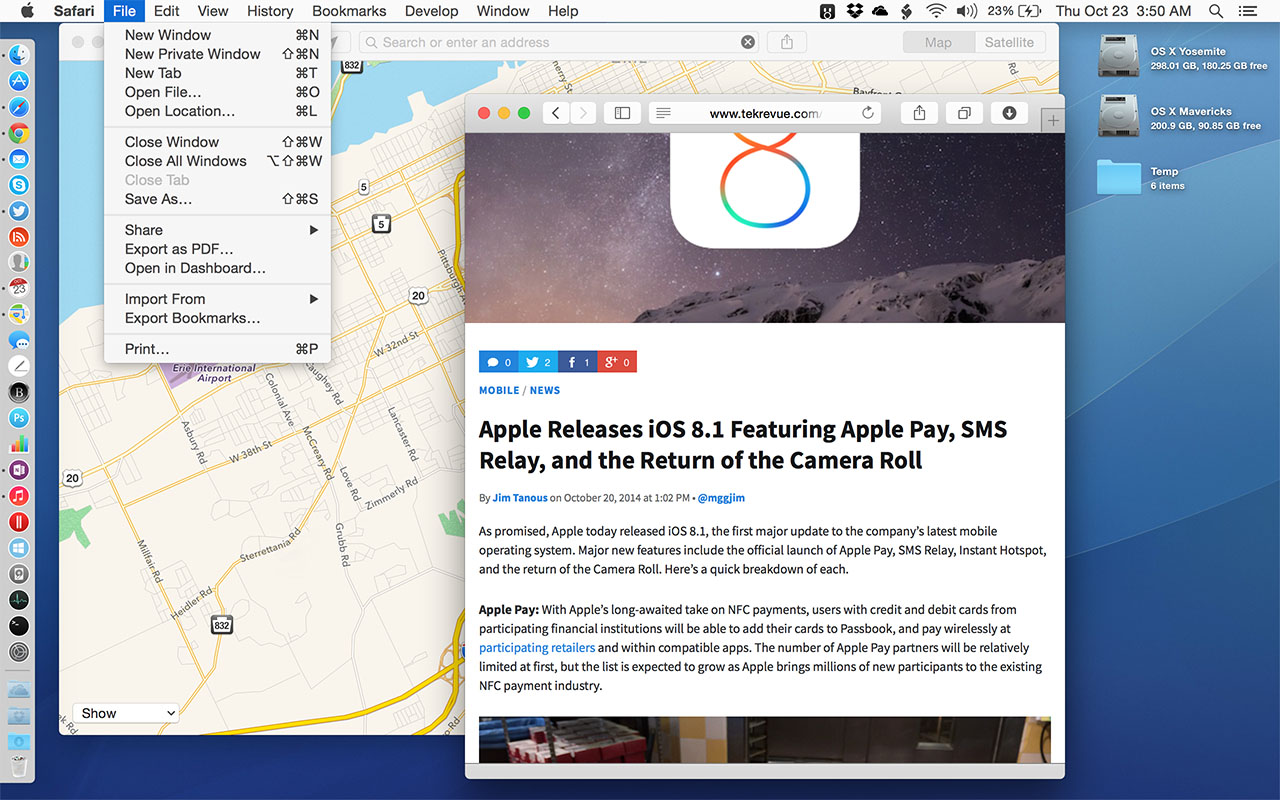
 As soon as you check the Reduce Transparency box, you’ll see your Dock, Menu Bar, and application windows immediately turn opaque. Even though the option is called “Reduce Transparency,” the effect is closer to “Disable Transparency,” as you’ll be hard pressed to find any transparency effects while in this mode.
If you decide that you prefer the new transparent look, you can easily revert to the OS X Yosemite default by heading back to System Preferences > Accessibility and deselecting the aforementioned box. This option is mostly one of personal preference, although we’ll soon be investigating if OS X transparency effects have any impact on battery life. Stay tuned.


2 thoughts on “How to Reduce Transparency Effects in OS X Yosemite”