How to Reposition the Screenshot Selection Area in OS X

OS X includes a great set of integrated screenshot tools, but one small feature you may have missed is the ability to reposition screenshot selection areas after they’re drawn. Here’s a quick tip explaining the process.
Users in OS X can take a screenshot of a particular area of their Mac’s screen by pressing Command+Shift+4. Doing so turns the mouse cursor into crosshairs, and the user can click and drag to define a screenshot capture area. Once the user lets go of the left mouse button, a screenshot of the selected area is taken. But what if you’ve miscalculated the dimensions of the object you’re trying to capture? Or what if you change your mind and want to quickly capture another area of your screen?
There’s no clear way to redraw or reposition your selected area once you’ve dragged it out. Releasing the mouse will create a screenshot you don’t want, and you can always just tap the Escape key to cancel the whole process and start over. But there’s an easier way.
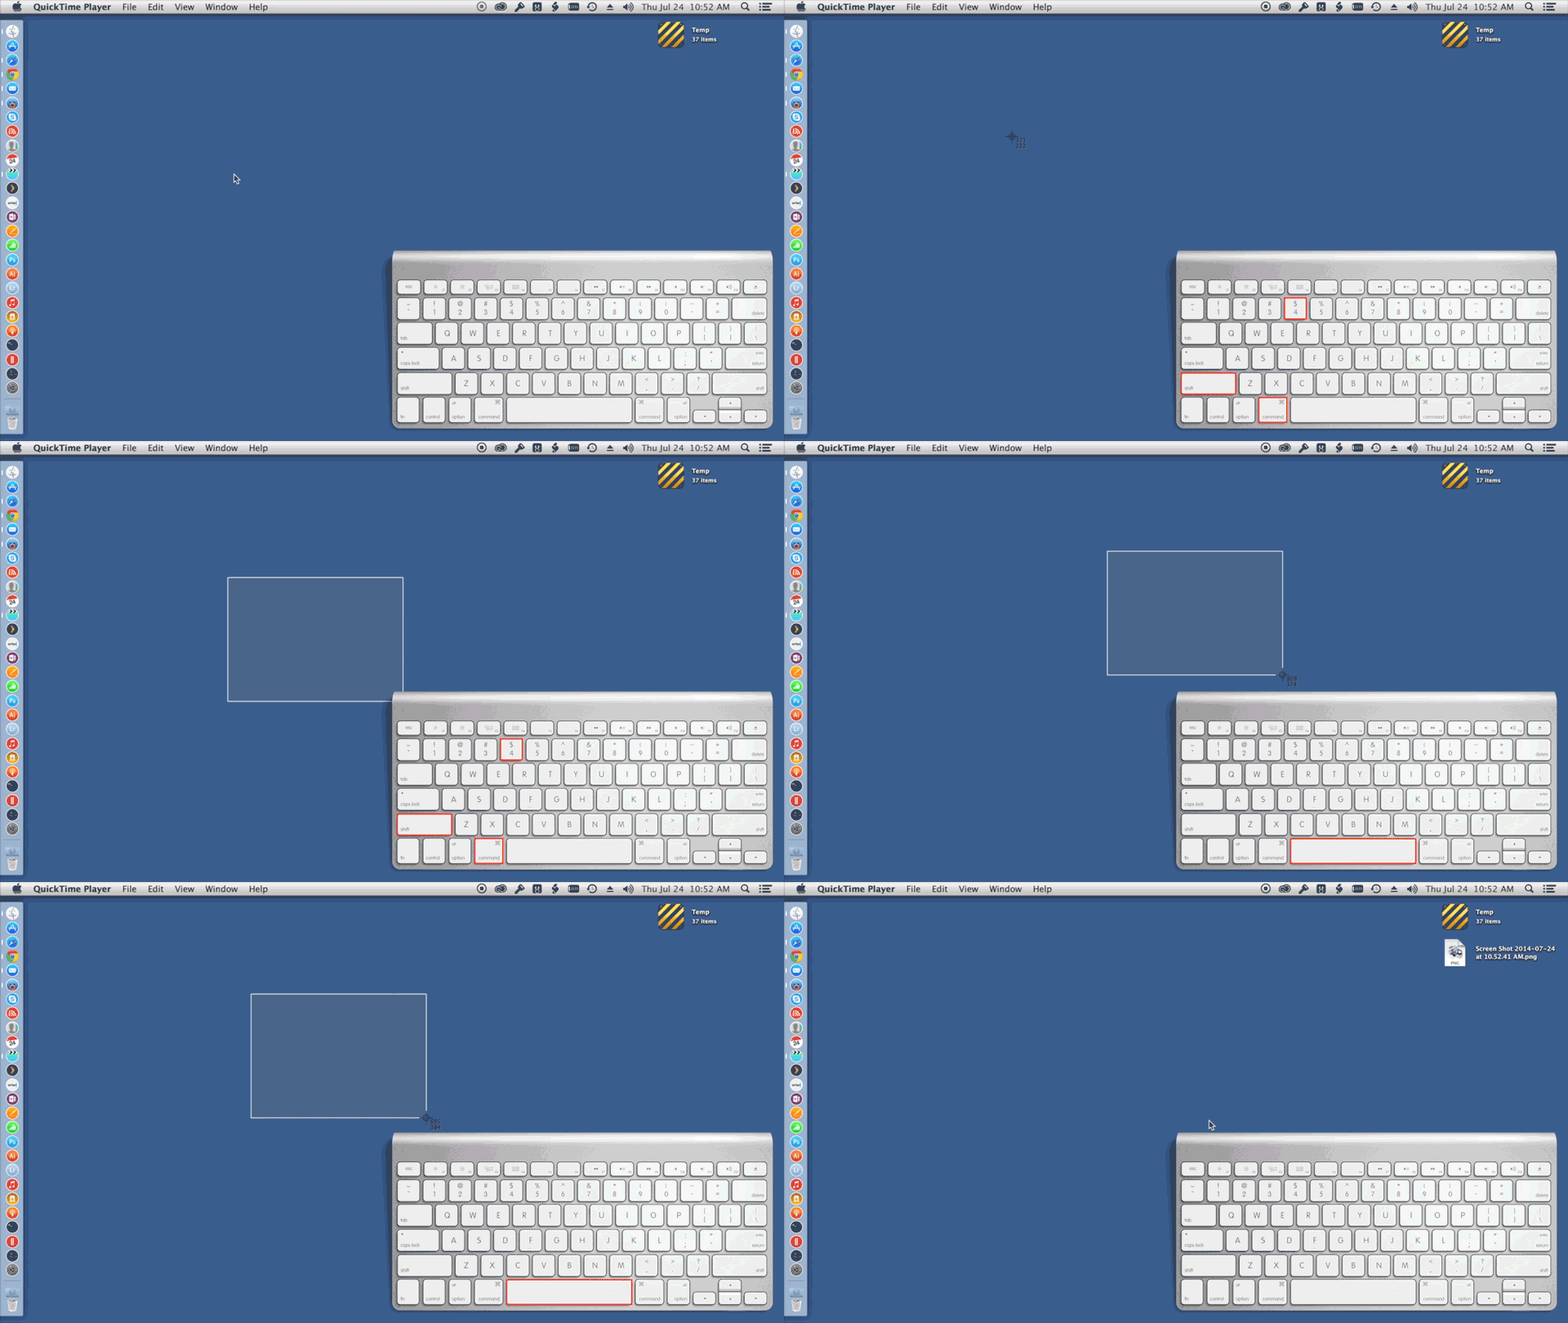
Once you’ve pressed Command+Shift+4 and drawn out your selection area with the mouse or trackpad, press and hold the Spacebar. As long as you continue to hold the spacebar and the left mouse button, your selection area will be locked and you can use the mouse to reposition it anywhere on the screen. If you move the selection box to the correct location on your screen but need to make it larger or smaller, just release the spacebar and you’ll be able to once again change the box’s dimensions. Check out the animated GIF below to see this tip in action.

Once you’re all set with your selection area, just release the mouse or trackpad button to capture the designated area.


One thought on “How to Reposition the Screenshot Selection Area in OS X”