How to Take a Screenshot on the Microsoft Surface Tablet

There are plenty of ways to take screenshots while running Windows on an x86-based PC or device, including some great third party software utilities like WinSnap. But if you’re using Windows on an ARM-based device, such as the original Microsoft Surface RT or Surface 2, many screenshot options and software are no longer available. While advanced third-party screenshot utilities for the Surface may be limited, Microsoft has still provided an easy way to take basic screenshots with just a quick button combination. Here’s how to take screenshots on the Surface and other Windows-based tablets.
First note that the method described here will capture your entire screen, but you can always edit your whole-screen captures after the fact in order to isolate the desired item or region.
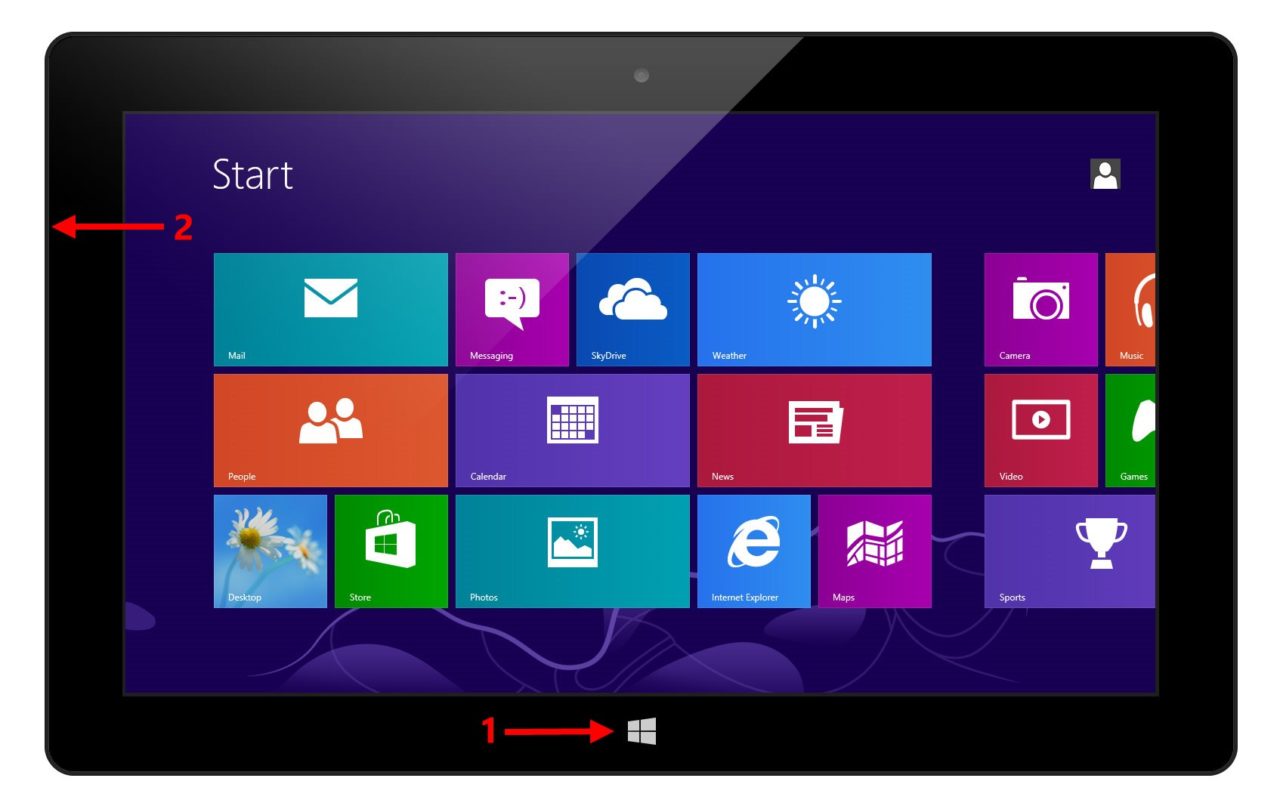
When you’re ready to capture a screenshot of your current Surface or tablet screen, press and hold the Windows button on the front of the device and then press and release the device’s volume down button. Note that we’re talking about the Windows button that’s on the device itself, not the Windows key that may be on a Bluetooth keyboard or, in the case of the Surface, a Touch Cover or Type Cover. The steps are illustrated in the image below, although the Surface volume toggle is hidden by the perspective of the image.

Once you press the volume down button, you’ll notice the screen dim for a quick second and may hear a shutter sound depending on your volume settings. This indicates that a screenshot has been successfully captured. By default, Windows will save the captured screenshots to a folder called Screenshots in your user’s Pictures folder. Images will be saved in the Portable Network Graphics (.png) format.
Related: Learn how to move your default Windows screenshot folder to a location other than your Pictures folder.
The steps above deal with the quickest way to grab a screenshot on a Windows tablet — at heart a replacement for the Windows Key + Print Screen option that non-tablet Windows users enjoy. If you want to exercise a bit more control over your screenshots, such as saving in a different file format or capturing just a single portion of the screen, you can use the Windows Snipping Tool, which is available for both x86- and ARM-based versions of Windows.


3 thoughts on “How to Take a Screenshot on the Microsoft Surface Tablet”