How to Setup a Cisco Router
If you’ve just received a Cisco router, chances are you’re wondering how to change the wireless network name, password, or some other setting. Cisco lets you do all of this and more by using a website, which can be accessed with the router’s address. Stay tuned to see how you can find that address, access the site, and then make the changes you want.
Locating the Router Address Inside of Windows
To locate your router’s address in Windows, which is referred to as “Default Gateway,” here’s what you need to do:
- Whatever version of Windows you’re running, you can open the Run application by pressing Windows+R.
- Since Run opens applications for you more easily, enter “cmd” and click on “OK” to open the Command Prompt.
- Type in the “ipconfig” command and hit Enter to see all the crucial info about your IP configuration.
- Look for the default gateway. Don’t close the Command Prompt, as you’ll need this number later.
Locating the Router Address Inside of Mac
- Open the Apple menu by clicking on the Apple button.
- In the following menu, choose “System Preferences…”
- From the System Preferences, go to “Network.”
- Click on “Advanced.” It’s a button located in the bottom right corner.
- Select the tab that says “TCP/IP.”
- The “Router” value marks your router address.
Accessing the Cisco Router Web Address
To access all of your Cisco router settings and change them, you have to log in to the router site:
- To begin, open any web browser.
- Take your Default Gateway/Router value and type it in the address bar.

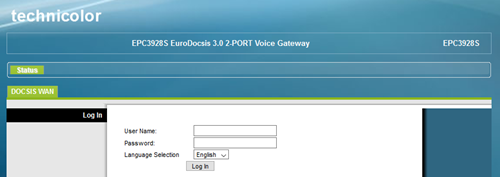
- Your next stop is the settings site for your router. It first prompts you to type in your username and password. If you’re setting up your router for the first time, its login credentials are most likely still set to their factory defaults. These tend to vary on different Cisco models, so here are some of the most common credentials you should try entering:
No username, no password (just click “Log In”)
Username: “admin,” Password: “password”
Username: “admin,” Password: “admin”
Username: “cusadmin,” Password: “password”
Username: “cisco,” Password: “cisco”
If none of these help, contact your internet service provider.
Router Site Tabs
There are more than enough ways to set up your Cisco router here, but many of these options are for advanced users. Here are some of the most important ones that you should set to your liking, divided by the site’s main categories.
Administration
As soon as you log in, you’ll find yourself in the Management Tab of the Administration category. Here’s where you can change the login credentials for this site.
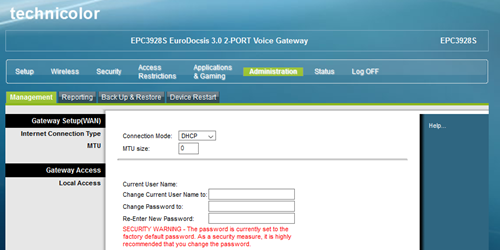
Other than that, you can enable email reports in the Reporting tab, backup or restore your network configuration in the Back-Up & Restore tab, or restart your device by going to the Device Restart tab.
Setup
The Setup category is important because this is where you can change your username and password for the wireless network itself, not just for this web address. You can do it in the Quick Setup tab, which appears right away after clicking on Setup.

The options you are looking for are “Network Name (SSID)” and “Passphrase” at the bottom of the tab. Here’s where you can also set the encryption and password types. You can also disable the password altogether by choosing “Disable” in the “Security Mode” dropdown menu, although this is not recommended at all.
In the LAN Setup tab, you can change the IP address, as well as the router address (Default Gateway).
Wireless
When you enter this category, you’ll be greeted with “Wi-Fi Protected Setup.” This is a handy option if you need to further enhance your wireless network protection. It lets you use two-point authentication while logging in, similarly to some smartphone apps.
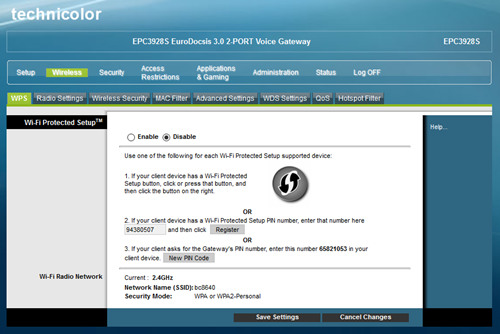
In the following tab, Radio Settings, you can change the Wi-Fi radio network settings such as the network mode, band, channel width, and channel number. The “Wireless Security” option lets you change the security mode, encryption, or passphrase/password.
Access Restrictions
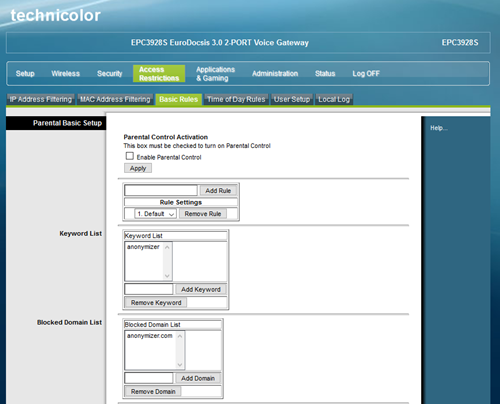
Besides allowing you to set up IP and MAC address filtering, this category also lets you enable the parental control option. You can do that in the Basic Rules tab and easily allow and block sites. In the Time of Day Rules, you can further adjust this to your liking and block the network at certain times of the day. Finally, the User Setup tab lets you add user accounts so you can put different time access rules on each of these.
Other Categories
The remaining categories aren’t mentioned because either most of their settings are quite advanced. In the case of the Status category, you can’t set anything up, you can just see the status of your network. This is a useful option if you forget your Cisco router’s serial number, but don’t want to look for it on the device, or if it isn’t visible anymore due to prolonged use.
The Security category lets you look up Firewall and VPN settings, while the Applications & Gaming category is all about setting up port filtering and forwarding.
Accommodating the New Network
If you’ve never used a Cisco router before, rest assured that it’s no big deal. Whatever your skill level, you can easily access the router’s internet address and make changes to the settings.
What made you choose your router? Is Cisco good enough for you so far? Let us know in the comments below.


