Skype Keeps Asking to use ravbg64.exe – What Do I Do?

A TechJunkie reader wrote in asking how to address Skype errors. Specifically, ‘Skype keeps asking to use ravbg64.exe every time I start it up. It also never remembers my settings. What do I do?’ As always, we are only too happy to help our loyal readers and anyone else who sees the error.
First off, ravbg64.exe is not a virus or malware. It is a Realtek audio driver for Windows. Chances are the device you’re seeing the error on has an onboard sound device powered by a Realtek chip. This is the driver for it. Skype is asking if it can use the audio device to playback audio through the speakers if it is set as the default playback device.
It would be better if the error was more descriptive, or just said ‘Can Skype use your soundcard to play back audio’. It doesn’t, so here we are.

Skype keeps asking to use ravbg64.exe
There are a couple of ways to fix the request to use ravbg64.exe and a couple of ways to fix the fact that Skype never seems to remember your settings. First let us address the ravbg64.exe issue. We will set the sound card as the default playback device. If that doesn’t work, we can select ravbg64.exe manually and allow it access to Skype.
The exact look and feel of Skype depends on whether you are using the built in version within Windows 10 or the standalone version. Either way, you need to use the Settings menu.
- Select Tools in the standalone app or select your portrait image in the Windows 10 version.
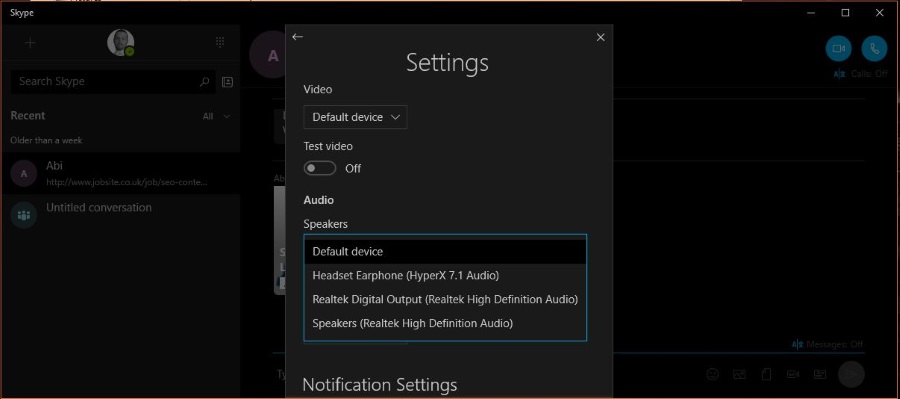
- Select Settings and Audio.
- Change the speakers from Default device to the speakers or headphones you want to use.
- Select OK or close the window and retest.
I have seen this error first hand on a client laptop and switching from Default device to named output device stopped the error occurring. Even though the speakers selected still use ravbg64.exe.
If that doesn’t work, you need to grant ravbg64.exe access to Skype. This is only possible in the standalone version.
- Select Tools and Settings in Skype.
- Select Advanced Settings and select the ‘Manage other program’s access to Skype’ text link at the bottom.
- Select ravbg64.exe in the Explorer popup window and select Change.
- Select Allow and then OK.
- Save the settings and retest.
This gives Skype specific permission to use ravbg64.exe so the error should now stop appearing. If you use Windows 10 Skype, you need to try the next two fixes.

Skype config settings
If the above fixes don’t work for you, there are two options left. Reset user configs or reinstall Skype. Let us first see if resetting the configuration works. The config is stored in the Skype folder within your AppData folder.
Open Windows Explorer.
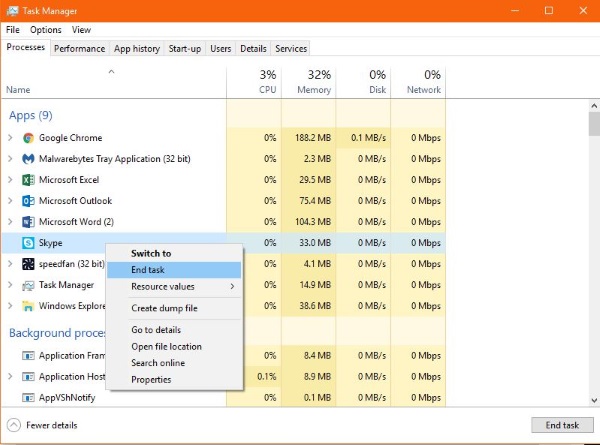
- Close Skype and stop the process in Task Manager
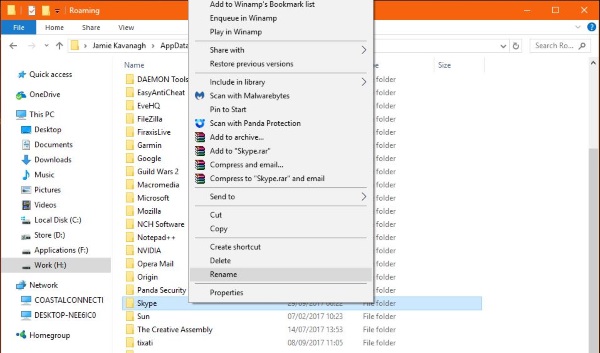
- Type or paste ‘%appdata%’ into the URL window of Windows Explorer and hit Enter.
- Navigate to the Skype folder and select it.
- Right click and select Rename. Rename it to something else. Good practice is to rename to FILE_old or FILE.old but you don’t have to.
- Restart Skype.
If Windows does not allow you to rename the folder, go back to Task Manager and ensure you have manually stopped the Skype.exe process. If the Skype process did not close or did not close properly it will still have an active link to the folder which will prevent modification.
- Right click an empty space on the Windows Task bar and select Task Manager.
- In the Processes tab, find the Skype process.
- Right click the process and select End process.
Retry the above to rename the Skype folder.
If none of those three fixes works and Skype keeps asking to use ravbg64.exe, our fix of last resort is to reinstall Skype completely. You will lose any saved conversations and call records but not your contacts as they are part of your Microsoft account.
- Select the Windows Start button and scroll down to Skype.
- Right click and select Uninstall. You will be taken to the Windows uninstall window.
- Scroll to Skype and select it.
- Select Uninstall from the menu bar and let the process complete.
- Reboot Windows to complete deletion and then reinstall.
This last process is one of last resort and should not really be necessary.
If Skype keeps asking to use ravbg64.exe, it has not saved the audio playback setting for one reason or another. At least now you have four ways of addressing it.
Know of any other ways to fix it? Tell us about it below if you do!


