How to Brighten Photos with Snapseed

If you really want your images to stand out on social media, you need to make sure that they look as good as they can. While many phone cameras and apps have various filters and functions, you often won’t have the time to fiddle with all the settings.
This is where a good photo editing app comes in, and Snapseed is one of the better options. Google purchased it from original developers Nik Software back in 2012, and it has since become one of the favorite editing apps for both Android and iOS.
Using the Editing Options to Improve Your Pictures
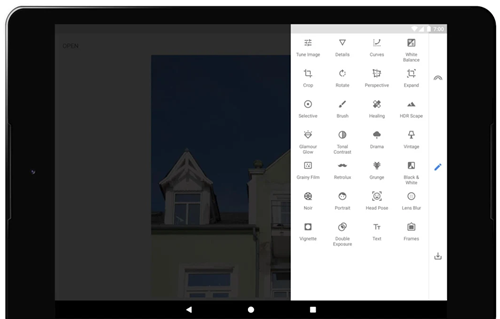
Snapseed has a wealth of tools that you can use to touch up your photos and really make them shine. Many of the most directly useful ones are found under the Tune Image option in the Tools menu, though it also has many filters, and even allows for selective editing of certain areas of the image.

Changing Brightness
Making your photos brighter than they originally appear can make the difference between an image that pops and one that fizzles. In order to change the brightness of a picture, simply do the following:
- Open the photo in the Snapseed app.
- Tap on Tools at the bottom of the screen.
- Tap on Tune Image.
By default, the app will now be ready to edit the brightness of your photo. Drag your finger to the left to make the image darker, and drag it to the right to make it brighter. Be careful to not go too far in either direction or you might make the picture either too gloomy or washed out.
Changing Contrast
Editing the contrast of a photo can really help to make the colors stand out from the shadows, and to make the viewers eyes focus on where you want them to look. To get to the contrast editing tool, take these steps:
- Open the photo in the app.
- Tap on Tools.
- Tap on Tune Image.
- Tap on the button at the bottom that looks like three horizontal lines broken by shorter vertical lines.
- Tap on Contrast.
Dragging your finger to the left will lessen the contrast of your image, while dragging to the right will increase it, making colors and shadows more pronounced.

Changing Saturation
Pictures are worth a thousand words, but only if people want to look at them. Changing the saturation of your image can really make the colors stand out from the others in people’s Instagram feeds. You need to be careful not to go too far, of course, as you might make your images look too clearly edited.
If you want to increase or decrease the saturation, do the following:
- Open the photo in the app.
- Tap on Tools.
- Tap on Tune Image.
- Tap on the three horizontal lines broken by vertical lines.
- Tap on Saturation.
Dragging your finger to the left will lower the saturation levels, and dragging to the right will increase them. Going all the way to -100 is one way to make your photo just black and white, though there are simpler options to achieve this in the app.
Changing Ambiance
Ambiance is one of the settings that allow you to change a number of levels in your photo at once, while still giving you more control than a filter or the automatic editing options. Its effects aren’t as drastic as using one of the individual settings either, so you can make simple changes that might be all you need to make the difference.
To change the ambiance of your image, take these steps:
- Open the photo in Snapseed.
- Tap on Tools.
- Tap on Tune Image.
- Tap on the three horizontal lines broken by vertical lines.
- Tap on Ambiance.
Dragging to the left with make your image darker and moodier by lowering the brightness and color levels and increasing the contrast. Dragging to the right will make it brighter and more cheerful by increasing brightness and saturation while decreasing contrast.
Changing Highlights and Shadows
We’ve bundled these two functions together because they’re essentially two sides of the same coin. The highlights tool intelligently makes bright areas of the picture brighter or darker, while shadows does the same for darker areas. To access either of these options, do the following:
- Open the photo in the app.
- Tap on Tools.
- Tap on Tune Image.
- Tap on the three horizontal lines broken by vertical lines.
- Tap on either Highlights or Shadows.
For both of these options, swiping to the left will make the area of focus darker, and swiping to the right will make it brighter. Shadows is especially useful for picking out the details that might have been lost due to tricky lighting conditions.

Auto Adjusting Your Image
If you don’t have the time or inclination to fiddle around with all the settings yourself, you can get Snapseed to do all it can to make your image look its best. While it’s rarely as effective as tweaking things to perfection by yourself, it can still be a handy and quick way to get more from your gallery.
If you want to give the Auto Adjust a try, just do this:
- Open the photo in the app.
- Tap on Tools.
- Tap on Tune Image.
- Tap on the icon at the bottom that looks like a magic wand with three stars near it.
Don’t worry if you’re not happy with the results – they’re not permanent and can easily be reversed by using the options we’ve covered above.
#NoFilter
Just because you’ve not used a filter on your image, it still might benefit from a bit of extra TLC in the editing suite. Just using the basic functions we’ve gone into here, you can make your image stand out from the crowd and start raking in those likes.
If you’ve got a favorite tool that you think is vital for making your pictures pop, why not share it with us in the comments below?


