How To Speed Up Google Chrome [January 2020]
![How To Speed Up Google Chrome [January 2020]](https://www.techjunkie.com/wp-content/uploads/2016/06/google-chrome13-1280x720.jpg)
When it comes to choosing a browser, you’d be hard-pressed to find one as fast and stable as Chrome. Sure, it’s not a perfect browser, but there’s a reason it’s become the most popular choice for surfing the web around the world. With a wide library of extensions and add-ons, millions of themes for customizing your browser window, and support for all the other apps and services Google makes, Chrome is one of the best choices you can make for a browser in 2020.
Of course, it isn’t perfect. Just because Chrome is the best choice for browsing the web today doesn’t mean you can’t improve it. If your Chrome browser is running a little sluggish, lagging during opening, or making your entire computer feel slow, you aren’t alone. Chrome users run into slowdown all the time, but thankfully, there are plenty of ways to make Chrome faster. From quick tips and tricks to handy extensions that can give your browser a boost, powering up Chrome to run fast and speedy on your machine won’t take long at all. Let’s look at all the ways to make Chrome run faster on your device.
Disable Flash in Google Chrome
If your browser has been running slow today, the first thing you’ll want to turn your attention to is Flash. On its own, Google Chrome hogs quite a lot of your system resources, and with Flash—the last remaining built-in plugin as of 2017—running in the background of your PC, it can be even worse.
Plugins like Adobe’s Flash Player require a lot of power to run on your device, and although Flash is usually enabled to show certain content within your browser, it might be a good idea to disable it. For one, Flash, in particular, is considered a security risk. Not many web pages still use Flash in 2020, and Adobe plans on disabling support for their legacy plugin this year. So, instead of leaving a nearly-dead plugin to run in the background of your browser, it’s a good idea to disable Flash from running in the background of your browser completely.
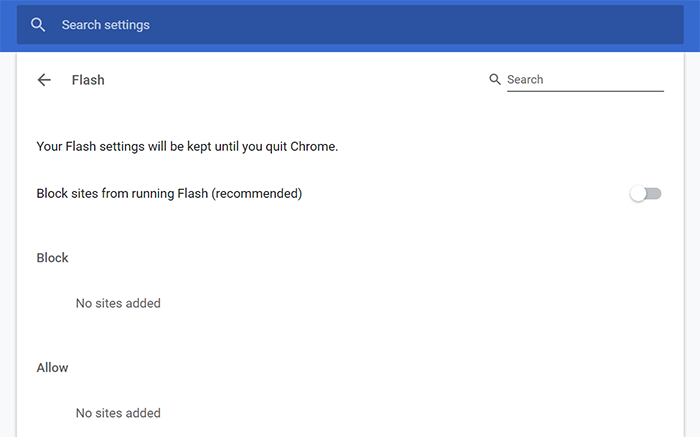
Head over to chrome://settings/content in the address bar at the top of your computer to open the Content section of your Chrome settings page. This is where Flash was moved after the remaining built-in plugins were shuffled to different sections of the browser. Click on Flash from the menu to load your Flash settings, then toggling “Block sites from running Flash (recommended)” on. This will require Chrome to ask for your permission before running Chrome in the background. As more and more sites move away from running Flash, this is an obvious plugin to disable within Chrome, and can really help speed up your browser in day-to-day use. And if you ever need to use Flash again, it’s easy to enable Flash within Chrome.
Switch off Google Chrome’s Extensions
Flash might be the last remaining plugin inside Google Chrome, but that’s because many of the browser’s tools have made the conversion to extensions. Like any browser add-on, Chrome’s extensions are extremely powerful, allowing you to make minor changes to how your browser works, or completely reinventing how web pages render and display in your browser. Extensions can be fantastic tools in their own right, but if you add too many, you might slow Chrome to a crawl.
When you add an extension to Chrome, it will automatically run in the background of your browser unless you switch it off. If you only have a couple extensions running on your computer at once, this shouldn’t be too much of a problem. However, once you start throwing in a dozen or more extensions, Chrome will really start eating up your computer’s memory. That’s why it’s important to make sure you’re managing how often the extension is running in the background of your browser. It’s a good idea to disable extensions you aren’t actively using. Better yet, you can also make sure to routinely check your extension list to clear it out of unwanted or unneeded add-ons.
Head over to your extensions menu at chrome://extensions to take a look at what’s installed on Chrome. Your extensions are listed in alphabetical order, making it easy to determine what is and isn’t running on your computer. You have a few options for what to do with each of your extensions.
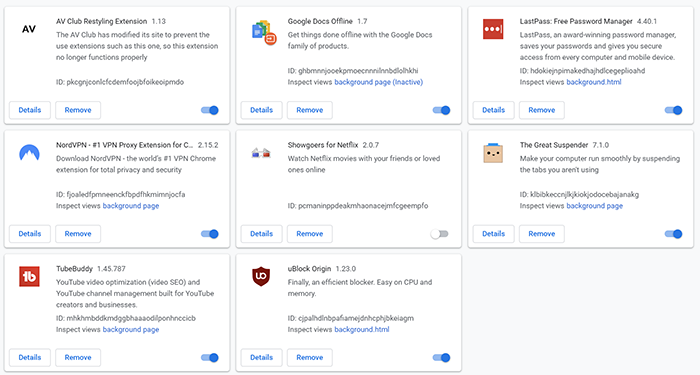
If you’re unsure where to start with what you’ve installed, we recommend clicking the Details button on each extension to get an idea of what each add-on is doing on your computer. From there, you have two options with your extension:
- Toggling the switch next to each extension will turn it off or on, without removing it from Chrome entirely. This means you can enable and disable the extension as you need it, without having to constantly reinstall the extension.
- Clicking on Remove will completely remove the extension from your browser.
All of this said, some extensions can actually help speed up Chrome by eliminating unneeded aspects of the web. Ad blockers are the best way to do it, removing resource-draining ads from web pages that can really slow down your entire PC. Likewise, using a VPN for Chrome can help with your speed and your security, protecting your data online and keeping you safe from prying eyes.
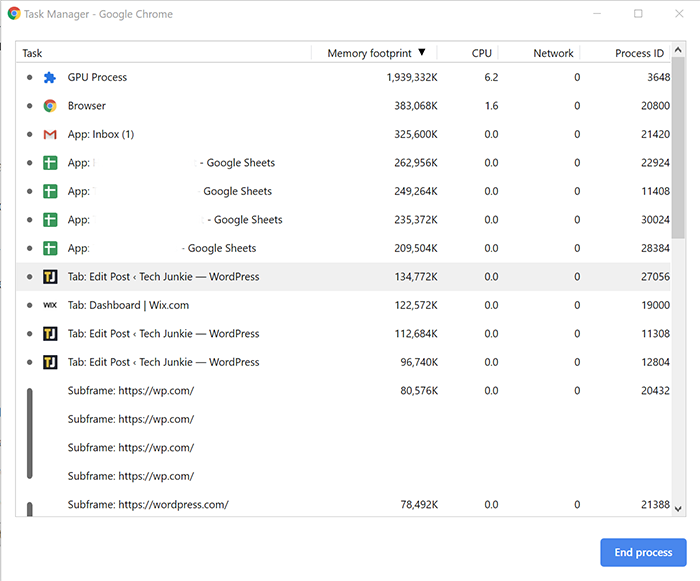
If you aren’t sure how to check what extensions are bogging down your browser, you can use the task manager built into Chrome to see what’s using your resources. Click Shift+Esc on your keyboard to open Chrome’s task manager. From here, you can sort by either Memory Footprint or CPU Usage. If you see an extension making its way into the top of either list sorting, you’ll want to see if you can disable it when it isn’t needed, or switch to an alternate Chrome extension that might use less memory or CPU power.
Switch Off JavaScript and Images
When it comes to increasing page loading time on websites, nothing hits harder than images and client-side JavaScript. JavaScript is the code that adds functionality to websites with the code running on your browser rather than the web server. Unfortunately, while it’s often necessary to make certain web pages work, it can have a very big impact on page loading speeds. It’s possible to switch off JavaScript to give a big boost to page loading times, but the downside, of course, is that you won’t get the functionality that JavaScript provides with the website you’re viewing. Same goes for images you may disable when viewing the web.
Thankfully, if you’re okay with removing certain visual elements, you can turn off both JavaScript and images altogether by heading to chrome://settings/content. To disable JavaScript, select JavaScript from the list of options and toggle it off. To disable images, do the same: select images from the menu and click “Do not show any images” from the toggle.
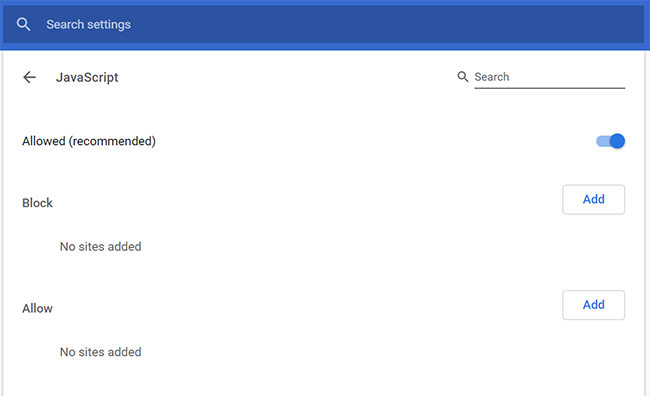
For both JavaScript and images, you can customize your experience by only allowing or only blocking specific websites. While disabling JavaScript from running natively is a great way to speed up your browser, you’ll need to make sure you do it properly in order for sites like YouTube to keep running correctly.
Add the Text Mode Extension to Chrome
Like we said above, extensions can be a great way to improve your browsing experience with Chrome, even if too many extensions can be a bad thing. Thankfully, Text Mode is practically designed out of the box to reduce the strain Chrome can put on your PC’s CPU and memory, while also decreasing the time it takes for a web page to load. It’s a great alternative to fully disabling images as we described above, since you can choose when you do and don’t want Text Mode active. It’s also one of the best ways to fix slow performance in Chrome.
To use Text Mode, head over to the Chrome Web Store to install the extension within Chrome. Once active, you can enable and disable the app as needed, in order to speed up your browsing time. With Text Mode active, paged in Chrome will open without images, videos, or animations.

When active, Text Mode has a ton of options to help make your browsing experience even better. You can remove color from website pages, select a full black and white mode, desaturate colors and disable white background pages, and change the pattern that replaces images within a webpage.
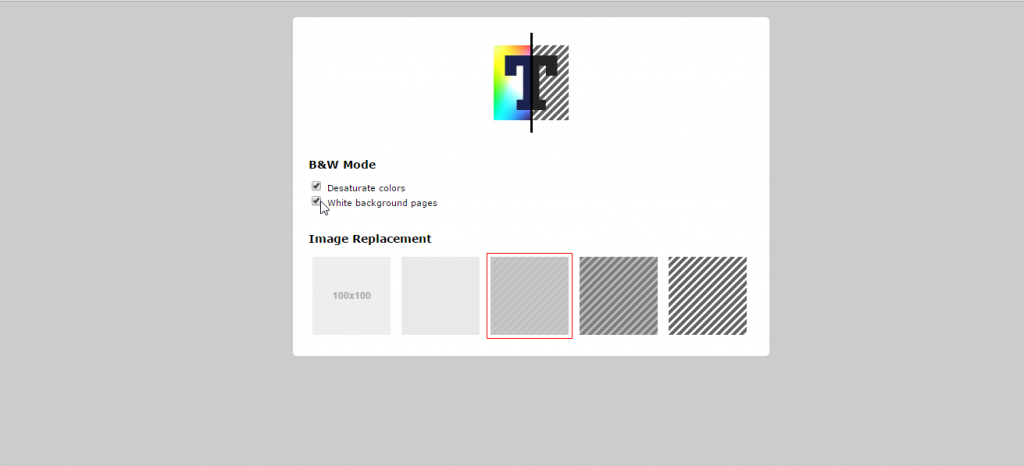
Text Mode can be enabled and disabled from the extensions menu in the top-right corner of Chrome.
Make Sure Chrome is Updated
This one is simple. Google pushes updates out to Chrome all the time, so you’ll want to make sure you’re running the newest version. A new version of Chrome should include bug fixes and updates that make your browser run faster and smoother.
If you have an update pending, you’ll notice a green, yellow, or red arrow in the top-right of Chrome that replaces your menu icon. Click this icon and select Update Google Chrome from the list.
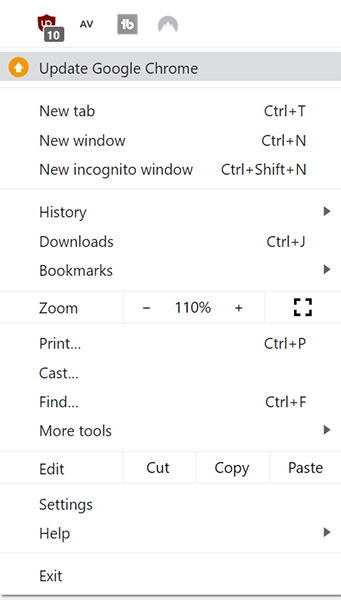
Of course, if you aren’t automatically receiving the update prompt, you can manually update Chrome to get the newest features and patches.
Changing Your Chrome Flags
You might not know this, but Chrome has a number of options hidden in a menu that allow you to change system-level settings or enable experimental features within Chrome. These are hidden under the flags menu in Chrome, which you can get to by entering chrome://flags in your browser’s URL bar. For these next few suggestions, we’ll be using this page to make Chrome faster.
Enable Parallel Downloads
As mentioned, Google Chrome’s chrome://flags page includes a variety of experimental settings you can use to speed up your browser, and for this tip, we’ll be doing just that. By enabling parallel downloads, you can make sure your download speeds are as fast as possible by letting Chrome create parallel jobs for each download. Some readers may already have this on by default, but it’s important to make sure this setting is enabled on your browser.

Head over to the flags page in Chrome and use the search bar at the top to look for Parallel Downloads. Using the drop-down menu to the right of this option, make sure it’s set to Enabled, not Disabled or Default. Once you’ve made the switch, Chrome will prompt you to relaunch the browser at the bottom of your display. Relaunch Chrome to make the change.
You can do this on all platforms except for iOS, so if your Android phone is having trouble downloading files consistently, you’ll also want to head to the flags page on your device. Unfortunately, Apple’s restrictions on third-party browsers stop iOS users from accessing the flags page in Chrome, but if Chrome is running slow on your iPhone, it’s easy to speed it up using the settings Apple does let you access.
Smooth Scrolling
One of the best ways you can increase your speed in Chrome is to make changes so that Chrome feels faster to use, and enabling smooth scrolling is one of the best ways to do it. Head back to the chrome://flags page we mentioned above. Use the search bar to look for Smooth Scrolling, then use the drop-down menu to the right of this option to set smooth scrolling to enabled. Once again, Chrome will ask you to relaunch.

This tip doesn’t work on Mac OS, unfortunately, but for Windows, Linux, Chrome OS, and Android users, smooth scrolling improves your browsing experience within Chrome by eliminating any input lag or skipping frames that come with scrolling through heavy web pages.
Enable Zero Copy Rasterizer
Our last of our three recommended flags to change is also one of the more technical options on this list. This step may not work for everyone, but it’s worth trying before moving through the rest of the guide. Head back to chrome://flags and click on the search bar, then enter Zero Copy Rasterizer. We’re going to enable this option in order to get your computer using raster threads, which will improve image rendering by writing directly to your GPU. Make sure you enable the option, but don’t restart your browser just yet. Click the search bar again, but this time, enter GPU Rasterization. Enable this option as well, then restart Chrome.
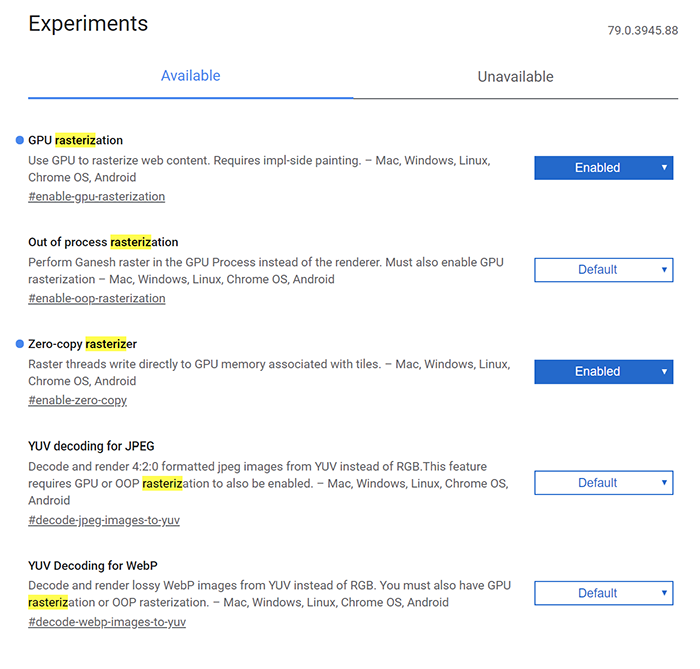
If you run into issues with these two rasterization options enabled, make sure to follow these steps in reverse to set rasterization back to default. Some sites, including Netflix, may experience slight hiccups when these rasterization settings are enabled.
Disable Hardware Acceleration
Our final flag to change might be the most important in this guide. Hardware acceleration uses your PC’s resources to help render the web faster than with software alone, but if you’re using an older PC, you might run into some problems with this. If you’re on older or slower hardware, disabling hardware acceleration is a must for Chrome.

Instead of heading into the flags menu, you’ll want to head to your Chrome settings menu by clicking on the menu button in the top right, then select Settings. To find the Hardware Acceleration settings, either use the search bar at the top of the page to type “Hardware Acceleration,” or scroll down to Advanced Settings, then find “Use hardware acceleration when available,” under the System heading. Uncheck this setting, then exit and restart Chrome.
Ensure Chrome isn’t Running at Startup
This is a simple one. When you installed Chrome onto your computer, you may have unwillingly and unknowingly enabled Chrome to run on your computer at startup. Running Chrome at startup can slow down your computer and make it harder to actually use your browser when you need it.
In Windows, click the Windows key on your keyboard and type Startup, then make sure Chrome is disabled from this menu. In MacOS, right-click on Chrome in your dock, then hover over Options and make sure “Open at Login” is disabled.
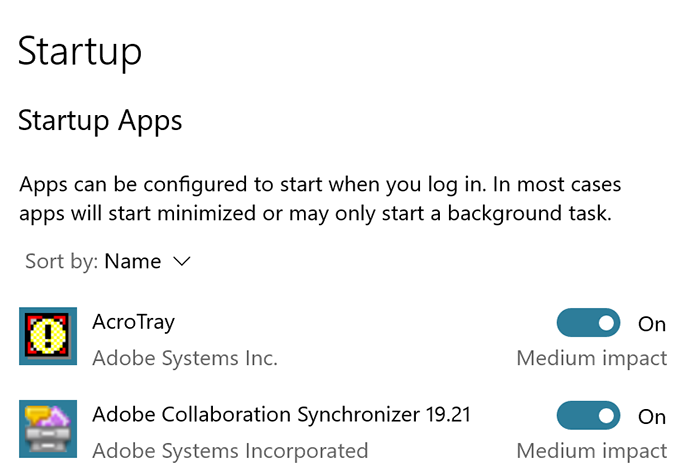
Making sure Chrome is only running when you actually want it to run is one of the most important steps you can take towards getting Chrome running at peak performance, and it can even help make sure Chrome runs faster when you actually launch it.
Tab Management
One of the most prominent complaints regarding Chrome online comes down to tab management. Millions of users have run into issues with Chrome constantly reloading their tabs when they’re trying to browse, which can result in lost data and hours of having to recreate your work.
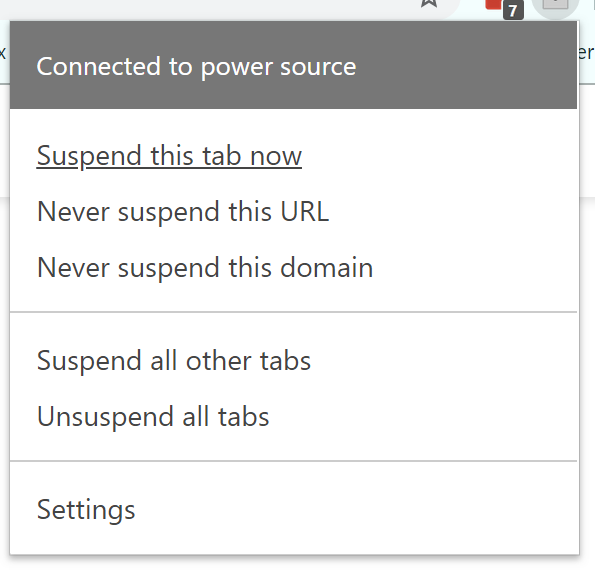
Instead of constantly losing track of your tabs, make sure to get your tab management under control with one of two apps we recommend. The first Chrome app, The Great Suspender, is a fantastic way to make sure background apps are destroying the performance of your PC while saving you some additional battery life in the process. The app allows you to put your tabs to sleep in order to keep them suspended in the background, rather than using resources by being active on your PC.
Our second recommendation, OneTab, performs a similar function, converting your open tabs into a list that reduces Chrome’s memory load on your PC. Restoring tabs from OneTab’s list takes a single click, making it easy to manage your workload while sparing your computer’s limited RAM.
Clear Your Cookies
Cookies are a real important piece of the web, necessary for keeping track of your data as you browse through different websites. This can make browsing a whole lot smarter, but it can also bog Chrome down with a bunch of unnecessary data. Clearing your cookies every now and again is a good habit to get into, and it only takes a moment of your time.
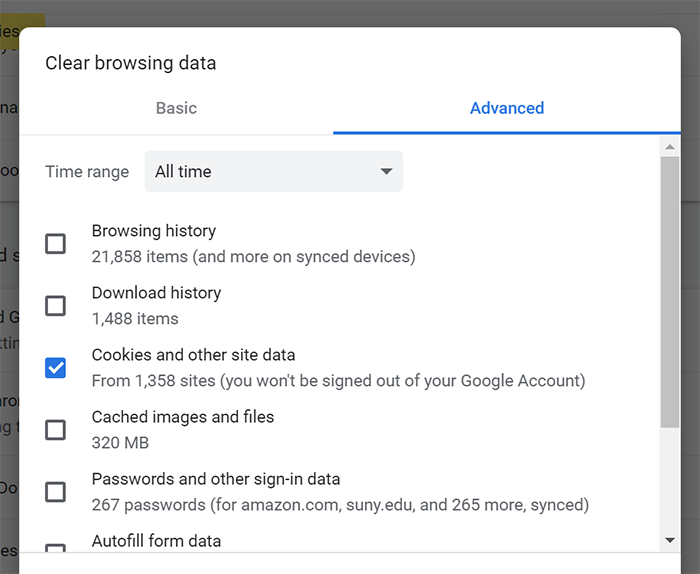
To clear your browser’s cookies, open up the settings menu in Chrome and type “clear browsing data” into the search box at the top of the page. Select “Clear Browsing Data” from the options highlighted and make sure “Cookies and other site data” is checked in this box. Once you’ve cleared your cookies, restart your browser. And hey, if you want to get a jump on our final section below, clear your history, cached images and files, and any other data from this list you feel like you can discard. We’d also recommend blocking third-party cookies entirely, which will save you the trouble of routinely clearing your cookies from this list.
Reset Your Chrome Settings
If you’re still trying to get Chrome to run faster on your computer, you might want to try resetting Chrome to its default state.
- Check your Chrome themes. Some themes can really bog down your browser, so it’s a great idea to select a more basic theme or to set Chrome back to its default look.
- Clear your browsing history. If you’ve been using Chrome for a long time, clearing your browser history can follow in your cookies footsteps and make things feel a bit snappier. You can automate this process to make it a step you never have to think about.
- Clear your Chrome cache. Follow the same steps described above to clear your cached images and files from Chrome.
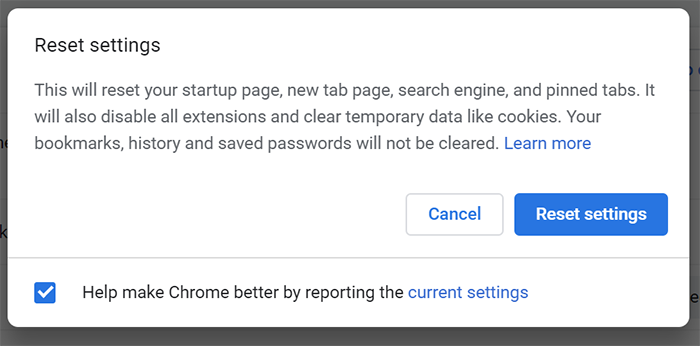
- Reset your browser. Head to the settings menu in Chrome and use the search box at the top of the menu to type “Reset.” Look for the option to “Reset settings to their original defaults” and click it. You’ll get a notice that Chrome’s about to reset your startup page, your new tab page, your search engine, and clear your pinned tabs. It will also disable all extensions and clear temporary data like cookies, repeating some of the steps we’ve covered in this guide.. Your bookmarks, history and saved passwords will not be cleared using this step, so if you want any of that information cleared, you’ll have to do it manually. Click on the Reset button to clear Chrome.
***
Google Chrome is one of the best browsers you can use today, with a wide library of extensions and Chrome apps and some of the fastest web rendering technology around, but it isn’t perfect. With these steps, you can give Google Chrome a serious speed boost in just a few minutes.


One thought on “How To Speed Up Google Chrome [January 2020]”
“C:\Program Files (x86)\Google\Chrome\Application\chrome.exe” –disk-cache-dir=”Z:\GCache”