Stayin’ Alive: Upgrading the CPU, Hard Drive, and RAM on a 2006 iMac
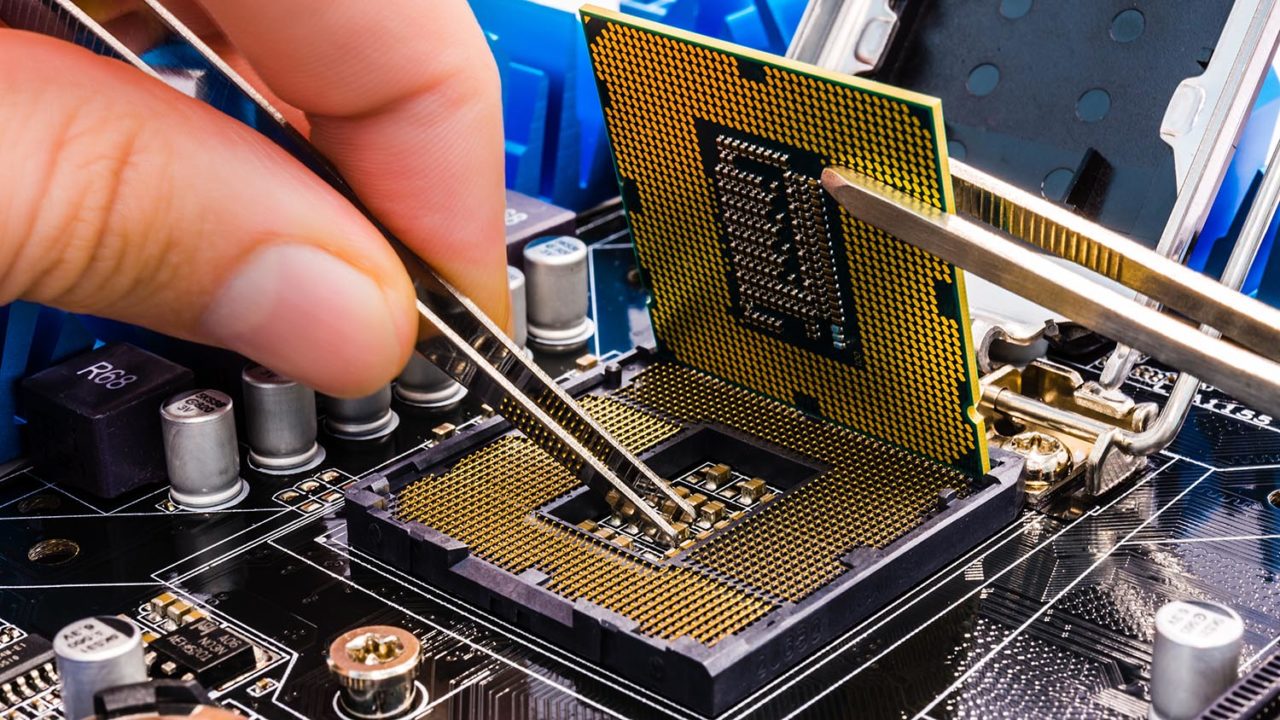
The days of upgrading modern Macs are practically gone. As a tradeoff for ever thinner and lighter products, Apple customers have accepted the reality that when their new Mac gets long in the tooth, it will find its way to the dumpster (or, hopefully, an electronics recycler). But it wasn’t always this way. Older Macs frequently offered multiple upgrade paths, with varying level of difficulty. So don’t toss or sell that old Mac, upgrade it!
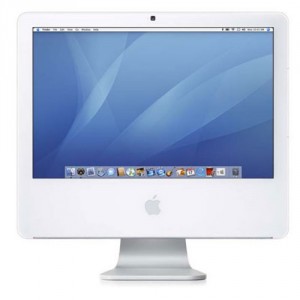 Recently, I did just that. While visiting my parents, I rescued a 2006 20-inch iMac from their basement. It was a bit of a homecoming for the system. The Mac was originally mine, purchased in college as an upgrade to my underpowered first generation Mac mini. It was my first Intel-based Mac, my first OS X Tiger system, and my first “dual-core” computer (not counting Intel’s early Hyper-threading options).
The Mac served me well, but I was quickly drawn to the Aluminum iMacs released in late 2007, so I upgraded and sent the neglected 2006 model to live with its grandparents. After picking it up again the other day, it was still in great physical condition, but was starting to show its age. The 250GB hard drive was making more noise than I was comfortable with, and the operating system, now OS X 10.5 Leopard, wasn’t able to run any modern software. The 2.0 GHz Core Duo CPU was fine for basic tasks, but its 32-bit nature, and 2GB of RAM also greatly limited my software options. Instead of wiping the system and selling it for maybe $100, I decided to see if a major overhaul could give this system new life.
Despite my ambitions, there were some constraints that were unavoidable. As we’ll discuss, I was able to raise the default RAM limit, but only to 4GB, and the built-in SATA connection was limited to a measly 1.5 Gbps. Further, the system’s GPU, a Radeon X1600 with 128 MB of memory, was soldered to the logic board, with no practical hope of removal.
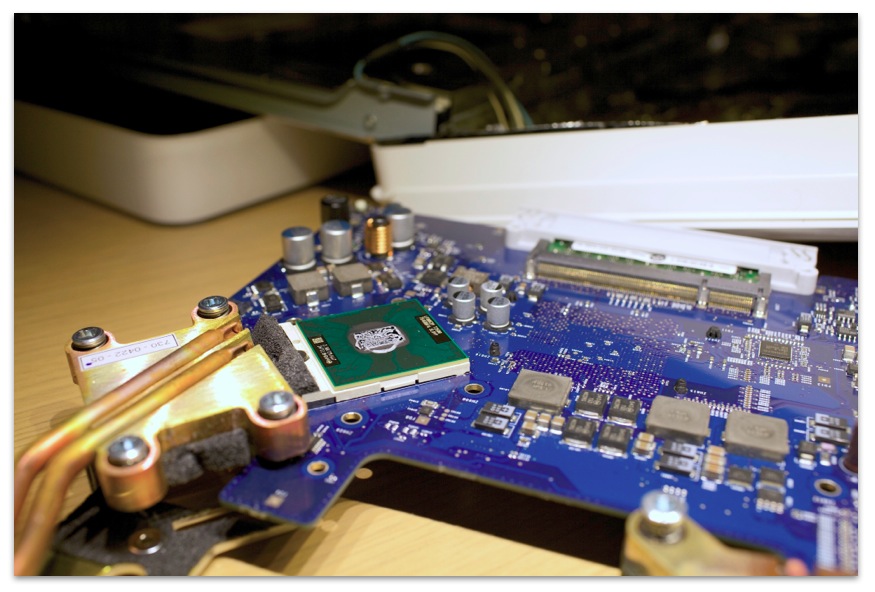
Still, the 2006 iMac was uniquely suited for this upgrade project. Not counting the Mac Pro, it was one of the last Macs with a socketed CPU, meaning that processor upgrades were possible if you could dig your way though the tightly-packed design of the system’s innards (Update: As many have pointed out, certain iMac models as late as the current 2013 generation also preserve the socketed CPU). The iMac also utilized a standard SATA connection for the hard drive, allowing for an easy swap without consideration for the proprietary temperature sensors found on newer models. With these items in mind, I settled on the following upgrades:
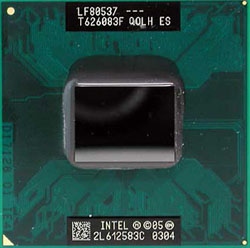
CPU: Intel Core 2 Duo 2.33 GHz T7600
RAM: 4GB Crucial DDR2 667 MHz (PC2–5300)
SSD: 256GB Samsung 830
SSD Adapter: Icy Dock EZConvert
Thermal Paste: Arctic MX–2
Some notes about my component selection: I went with the fastest compatible CPU, and that’s the T7600. They’re still fairly pricey when purchased new (if you can find them), but I picked up a used one from a reliable eBay seller for about $50. So make sure to look for a good deal in order to keep this upgrade project economical.
Speaking of economical, the Samsung 830 SSD is overkill for this project, but I had it available from a previous build. Since the iMac only uses a 1.5Gbps SATA interface, look for the cheapest SSD you can find from a reliable manufacturer. I also had the RAM available from an upgraded Mac mini, so I saved some money there. In the end, the only components I had to purchase were the CPU and the Icy Dock SSD Adapter, which cost about $15. That brought my total to around $70 with shipping. Had I needed to purchase the SSD and the RAM, the cost would likely have risen to about $300.
The Upgrade
The first thing we did was clone the iMac’s internal hard drive to the SSD using a SATA to USB adapter. We toyed with the idea of starting from scratch with a fresh install, but there were lots of files on the system and we wanted to make sure we had an opportunity to save any needed data. We knew we’d be upgrading the operating system later, and figured that we could always nuke and pave at that point once we made sure the hardware upgrades were successful.
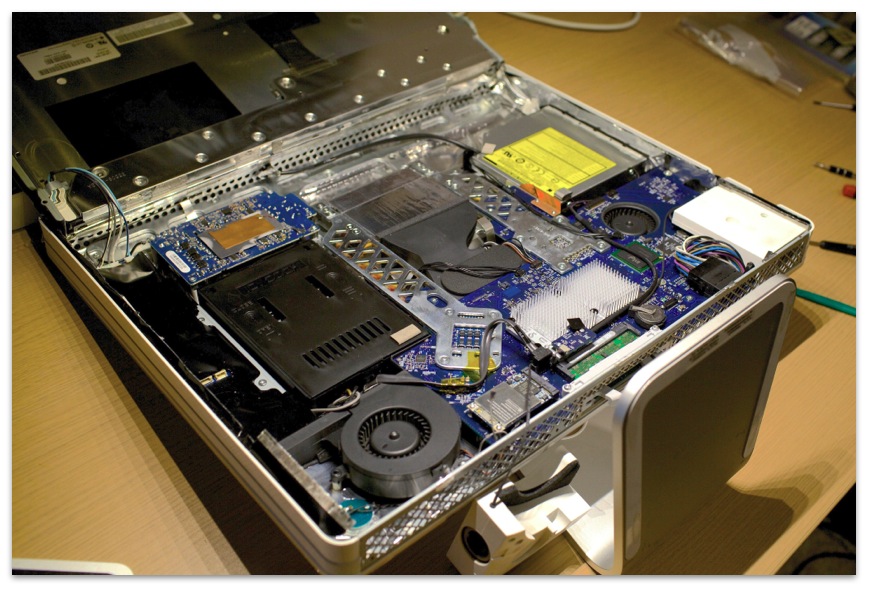
When it comes to the hardware upgrades, we’re just going to give you one word: iFixit. This great website has hundreds of beautifully detailed guides for repairing all sorts of computers, gadgets, and other electronics, including the one we needed for our 2006 iMac. These guides are so good that, during my time as an Apple technician, we frequently relied on the iFixit Guides over the Apple internal repair documentation.
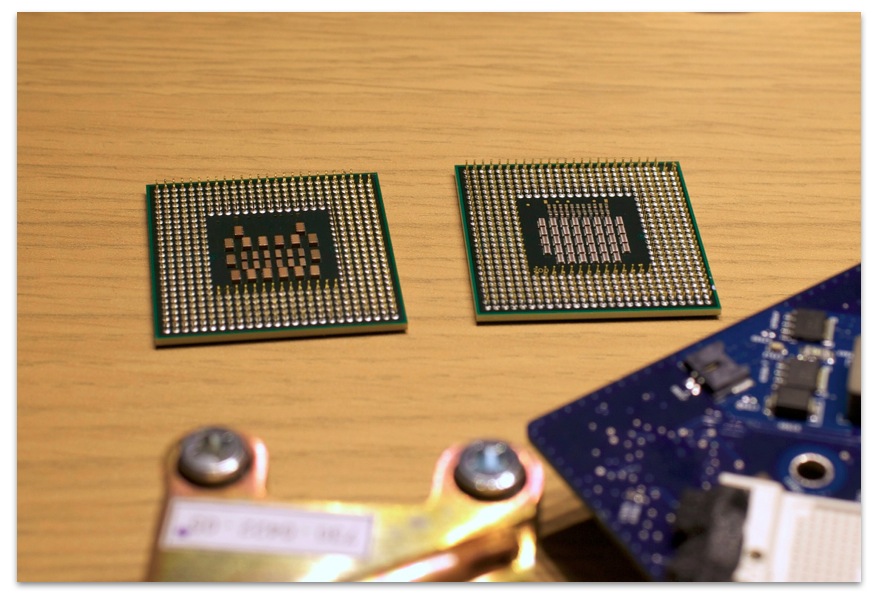
There’s no sense in repeating the steps here, but if you follow the guides at iFixit, most upgraders will have no trouble performing the CPU and SSD swaps. We’ll just give you these words of advice:
- Be careful with the data connectors on the logic board. You’ll need to disconnect several of them, and they can be quite fragile and brittle on these older machines. Use spudgers and tweezers wherever possible to avoid accidentally pulling out individual wires from the connectors.
- Use tape to keep disconnected wires secured outside of the open system. You’ll be removing and then reinserting the entire logic board, and it’s easy for some of these wires to fall into the chassis when you’re not looking and get inadvertently covered by the logic board when you put it back. There’s nothing worse than getting everything put back and screwed into place only to realize that your final data connection wire is missing and trapped underneath your newly reinstalled components.
- Make sure to clean the old thermal paste from the tops of the CPU and GPU as well as from the heatsink. Then reapply fresh thermal paste to both chips before reattaching. Even though we’re not dealing the with GPU, you’ll see that the GPU and CPU share the same heatsink, and you always want to reapply thermal paste whenever you remove a chip’s cooling apparatus.
- Don’t install the upgraded RAM just yet. We’ll need to update the Mac’s firmware first or else the system won’t boot (more on that below).
Overall, the upgrade took about one hour from start to finish. Experienced computer technicians will likely be able to do it even faster. We put everything back together, buttoned the system up, held our breath, and pressed the power switch. After a brief pause, the familiar Mac startup chime sounded and the iMac booted right up. Success!
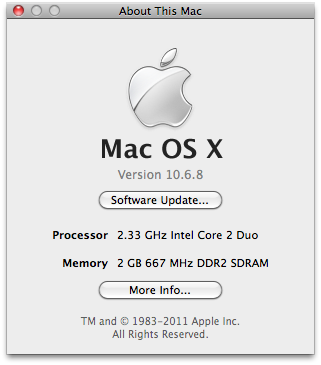
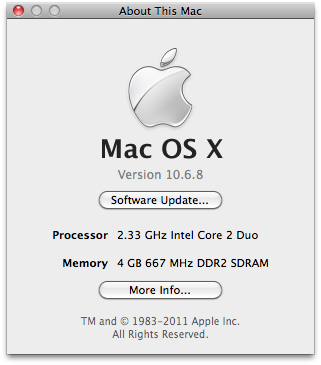
To check the status of the upgrade, we headed to the System Profiler. Sure enough, our Mac reported a 2.33GHz Core 2 Duo CPU and a 256GB solid state drive. Now we had to deal with the RAM.
Pump Up the RAM
By default, the 32-bit Core Duo iMac platform only supported 2GB of RAM. Now that we had a 64-bit Core 2 Duo, we were eager to upgrade the RAM to a maximum of 4GB, but we needed to convince the rest of the Mac that it could handle the larger RAM total. To do this, we’d need a firmware update.
While it’s possible to do this manually, the user MacEFIRom over at the netkas.org forums created a handy app that performs the upgrade for us. Basically, it takes the firmware from the late 2006 Core 2 Duo iMac and applies it to our early 2006 Core Duo system. The Macs were practically identical except for the platform switch to the Core 2 Duo CPU, so the firmware upgrade works beautifully.
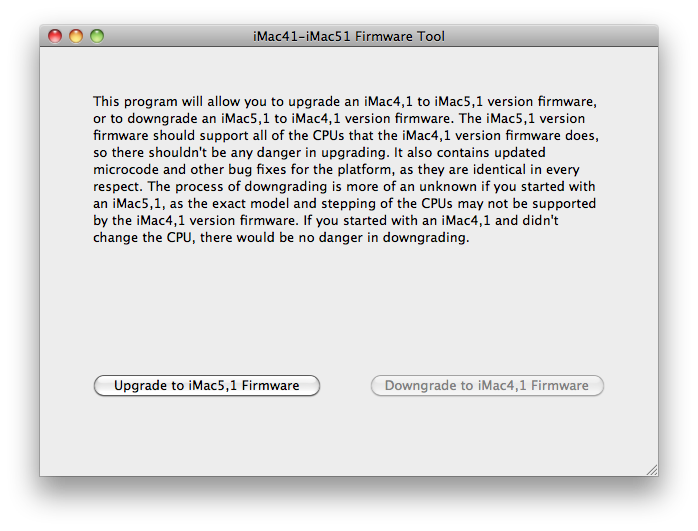
To use the firmware updater, simply download it (you’ll need to register a free account at the netkas forums to see the download link), and run it on the 2006 iMac. The app will create a RAM disk to prep the firmware files and then give you instructions on how to apply the update, which involves restarting the Mac and then holding the power button until the status light blinks. The update takes about 3 minutes and worked without a hitch on our system. After it’s done, you can shut the Mac down and install the 4GB RAM upgrade.
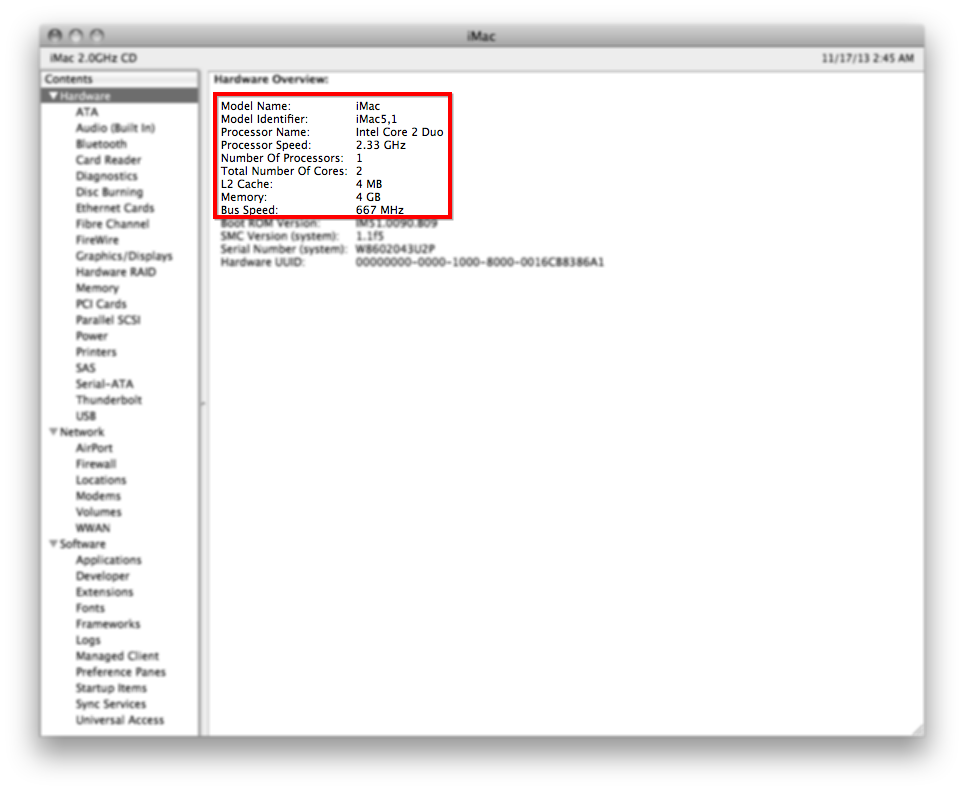
With the firmware update complete, our Mac reported itself as “iMac5,1” instead of “iMac4,1” and saw the full 4GB of RAM. That was it; our elderly and slow 2006 iMac was now decked out with a “new” 2.33GHz Core 2 Duo CPU, fast SSD, and 4 GB of RAM. It was time to deal with the software problem.
Cool Software, Bro
 Our iMac originally shipped with OS X 10.4 Tiger, but was running 10.5 Leopard when we picked it up. Officially, 10.6 Snow Leopard was the latest supported operating system, but there were many reports of users getting 10.7 Lion to install. Even though Lion would give us access to things like iCloud, it simply wasn’t the greatest operating system, and we believed that Snow Leopard would run better on the hardware.
A Snow Leopard system, updated and running the Google Chrome browser, would likely meet our needs just fine. So we dug up our old Snow Leopard installer, upgraded the OS, and then performed all necessary software updates to bring the system up to 10.6.8. Some quick testing confirmed our initial predictions. Microsoft Office 2011, Skype, Chrome, and Plex all worked great on Snow Leopard with our upgraded hardware.
Benchmarks
Our initial testing revealed noticeable improvements in performance; the system booted faster, apps launched in a flash, and everything seemed significantly smoother. We anticipated the need to quantify these changes, so we ran benchmarks both before and after the upgrade.
The SSD obviously helps with items like application launches and boots. While the iMac doesn’t boot nearly as fast as its modern counterparts, the installation of the SSD still shaved 12 seconds off of our cold boot test.
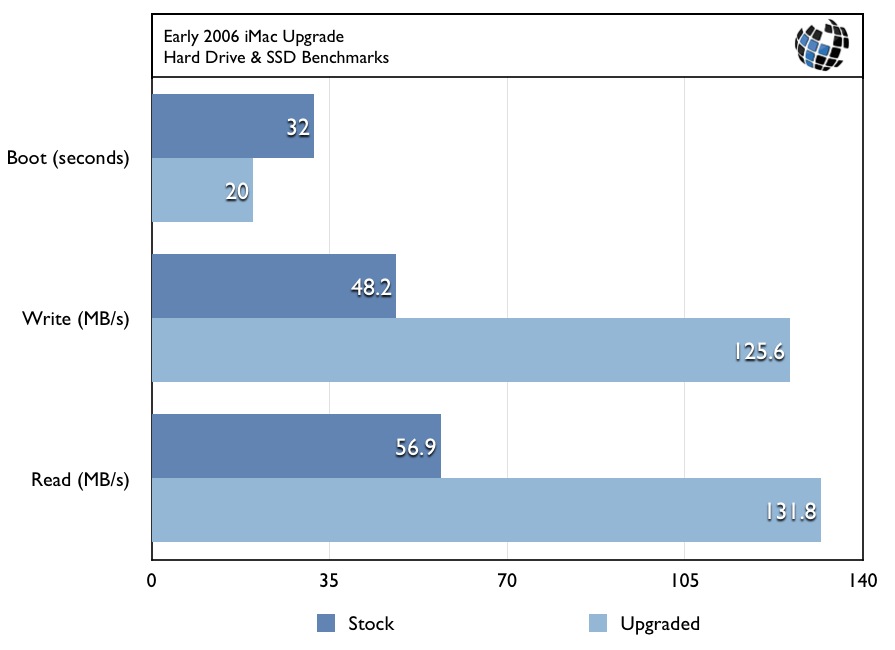
Pure read and write speeds also saw an unsurprising bump. Write speeds were 160 percent faster with the SSD, while reads were 132 percent faster. Note that this is only a comparison of the specific original hard drive in our iMac with the new SSD. As we mentioned earlier, the hard drive was quite loud, and may not have been operating at its theoretical maximum performance.
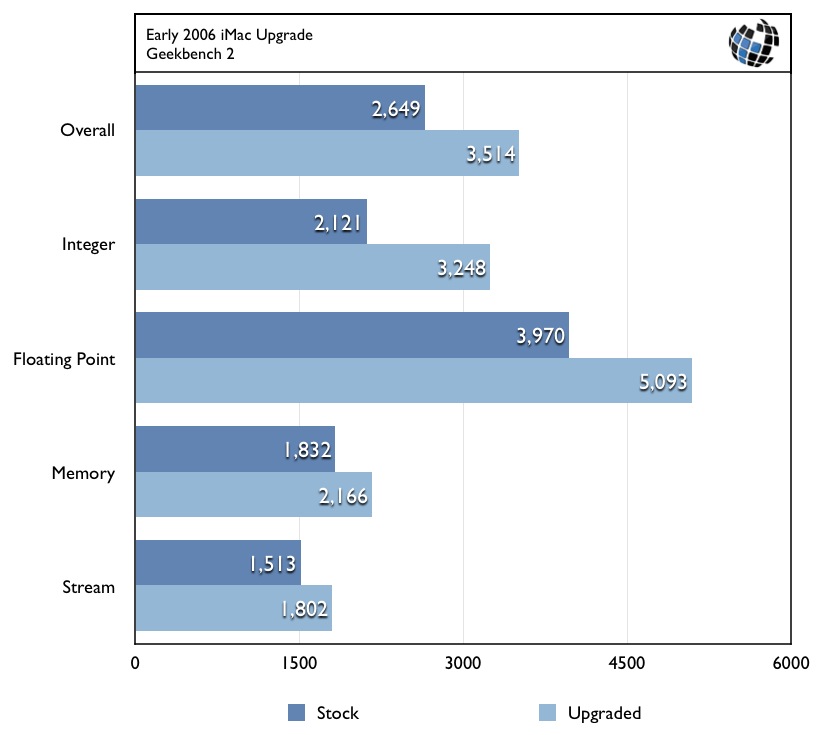
Looking at Geekbench, we saw excellent performance gains of between 18 and 53 percent. Note that these scores are from Geekbench 2. Our iMac didn’t meet the system requirements of the new Geekbench 3 test.
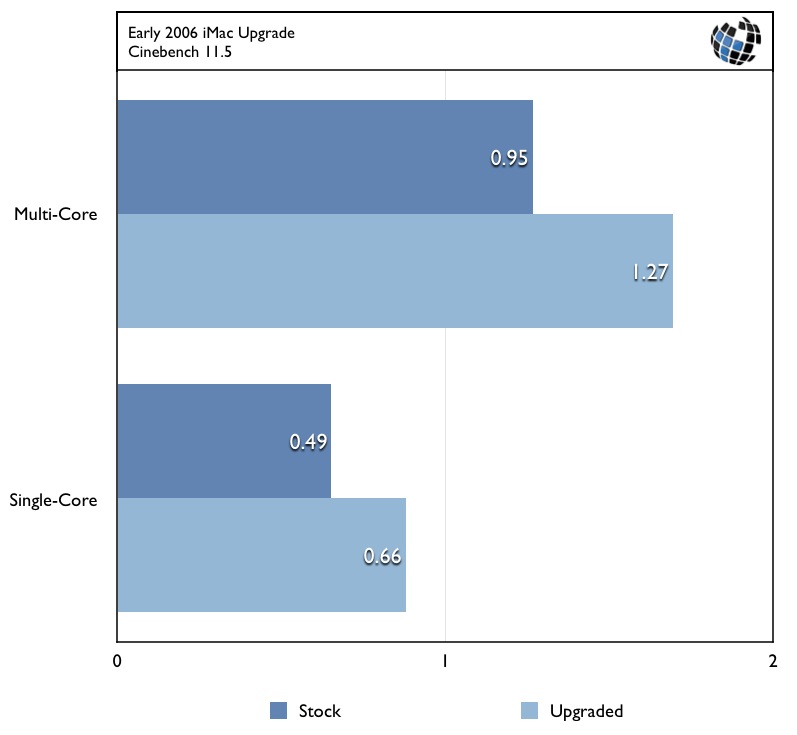
Maxon’s Cinebench tests both GPUs and CPU rendering performance, but our Radeon X1600 GPU was unsupported, so we were only able to compare single- and multi-core CPU scores. Both saw improvements of about 34 percent with the upgrade.
Back From The Dead
Most of these numbers pale in comparison to current generation Macs, and that’s not surprising. We knew we wouldn’t be creating a powerhouse with these upgrades, but what we found is that our “new” iMac now makes a respectable secondary computer. The Core 2 Duo CPU and 4GB of RAM can handle most basic productivity and entertainment tasks, and the SSD makes loading apps feel almost as fast as they do a modern computer.
Whether the upgraded iMac ends up as an extra system in the guest room, a fun play computer for the kids, or just a backup for when a main Mac is out of commission, this upgraded system is definitely usable, and we couldn’t have said the same thing pre-upgrade. In addition to the excellent learning experience of upgrading an Apple product, we’re also happy to keep a computer “in the field” and out of the landfill.
Have you upgraded your older Mac recently? Or are you now inspired to undertake the project? Let us know in the comments!









30 thoughts on “Stayin’ Alive: Upgrading the CPU, Hard Drive, and RAM on a 2006 iMac”
– MLPostFactor will get an iMac 5,1 to Mountain Lion (10.8.x). 10.9 or higher seems to require high version of graphics API than the available OSX X1600 driver supports.
– Using bootcamp, you can get Win7 running with all drivers. Win10 can run with generic graphics driver. No X1600 driver so stay at Win7 if you want full GPU assist.
– For browsers, Safari, Chrome, and Firefox have all obsoleted 10.8. Waterfox is clone of Firefox and works great even for sites with the latest web tech.
To those who are or have ever considered this CPU upgrade for this model of iMac, if you know what you’re doing and are careful it is definitely worth the effort. The 2.33 vs the 1.83 CPU makes a world of difference.
i’m just about to upgrade an A1207 20″ Intel 2.16Ghz IMAC. Along the lines of this article.
Also, I’m fairly sure one of the RAM slots is a fixed card of 0.5 GB. Just about to check.
Just to make sure a few. To upgrade iMac 4,1 to support core 2 duo all you have to do is purchase the Core 2 Duo T7600 and install it. NO need to purchase the logic board?
and even in 2015 – T7600 is the fastest option that is supported by default?
thanks and really appreciate this article saved me so much head aches.
I tried creating an account on Netkas but they never sent the activation email, nothing in the spam/bulk folders.
Note: I’m just passing this along; I haven’t used it since this article was written and can’t guarantee that it will still work, etc.
Also installed a new core2duo CPU (T7200) and 2+2GB of RAM since I could get both things quite cheap. SSD + adapter was out of the scope for the time being. Thanks again for providing all this info!!
I upgraded my iMac 2006 with a T7600 processor, also put 2GB of RAM into the machine. The Mountain Lion installation worked fine through firewire & target disk mode and my MacBook Pro. But the machine seems to have some issues, as short freezes sometimes happen and especially online video performance works very poorly.
So I tried to download the firmware updater from the netkas forum. But it seems that the registration to the forum doesn’t work anymore. I didn’t receive the activation email, though trying with several email adresses.
Does anybody have the Netkas iMac 2006 4,1 to 5,1 firmware updater available and could send it to me?
It would be of great help!
http://forum.netkas.org/index.php/topic,2246.0.html
It is possible to install the AirPort Extreme 802.11n Enabler for Mac in some way?
Hi Jim, Thanks for the clear reference next to iFixit ;)
As an experiment kind of down-upgraded an early 2006 20inch imac (EMC2105) by exchanging the 32-bits 2.0Ghz T2500 Core Duo with a 64-bits 1.66Ghz T5500 Core 2 Duo (Merom)from a DELL Latitude D620. De latitude is happier now with a lower battery drain by the 32-bitter and it is completely fine to run the 32-bits Linux kernel on it for research purpose. The iMac is happy to do 64-bits work now with effectively 3Gb RAM and a new HDD.
As a matter of fact the latitude d620 was produced at the end of 2006 so it is not a real coincident that the same processor family was implemented as in the imacs and the first macbook pro’s .
Thanks again
I can hear a click in the inverter board when I plug it in, but the machine does nothing when I hit the power button. I replaced the inverter (had broken a plastic socket on the bottom edge) and rechecked all connections for fit and tightness, but no luck. Any advice?
I’ve tried replacing the board battery, reseated the RAM modules, held down the power key for over a minute both before and after plugging it in, tried other outlets…but no luck. :-(
Dumb question: I’m trying this with the top case open. I’m assuming there are no safety latches preventing startup. I see none.
If this will be your primary Mac, the upgrade to Lion is probably worth it for the security and online features. If it’s a secondary Mac, it will run much better with Snow Leopard, especially when paired with an SSD.
Good luck with your upgrade!