Steps for Fixing the Microsoft Excel Sharing Violation Error

Excel is a fantastic program when it’s working properly, but can be aggravating, confounding, or both at once when it isn’t. For example, when you try to save your work and receive the following message:
“Your changes could not be saved to ‘FileName’ because of a sharing violation. Try Saving to a different file.”
This “Sharing Violation Error” has a number of different causes. This article explains the major causes and what you can do to fix them.
Why Am I Seeing This Message?
Here are the major causes of Sharing Violation errors:
- Permissions – You don’t have the necessary privileges to edit, index, or save the current file. This might be server related, or based on the access controls of the file or the folder that it’s in.
- Simultaneous Editing – You could be working on a document at the same time as someone else. This happens often in the case of shared files.
- Sharing Wizard – This is Microsoft’s simple method of sharing files across complex networks. But sometimes folders in File Explorer may have this nifty tool disabled.
- File Corruption – The file has been damaged.
- Antivirus – An overzealous antivirus might interfere with the saving process if it suspects a security issue.
Possible Fixes
Here are a range of solutions that you can try to address the above issues. After applying each of these methods, it’s a good idea to restart Excel and preferably your PC as well, to ensure that the changes have taken effect.
Enable File Indexing for a Folder
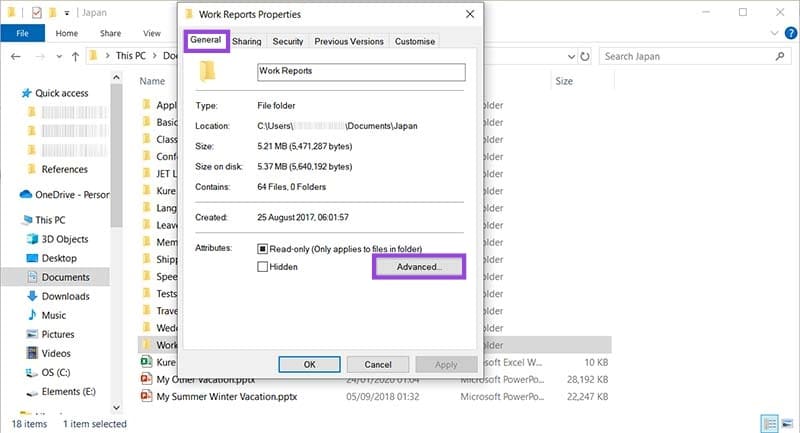
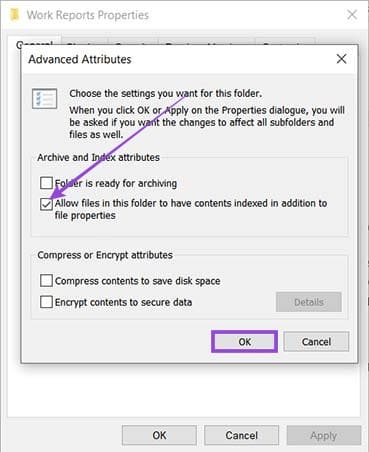
Sometimes a folder might not have indexing permissions enabled in Windows Explorer, which prompts a Sharing Violation error. In this case, you’ll need to manually check the folder and change the permissions, if necessary. Here’s how:
- Open the folder containing the troublesome Excel file in Windows Explorer (press Win + E to open the Explorer).
- Right click the folder and select “Properties” from the context menu.
- Under the “General” tab of the folder properties, click the “Advanced” button.

- In the “Advanced Attributes” window, check the box next to “Allow files in this folder to have contents indexed in addition to file properties”.

- Click “Apply” and the changes will take effect.
Enable Archiving and Indexing for the Excel File
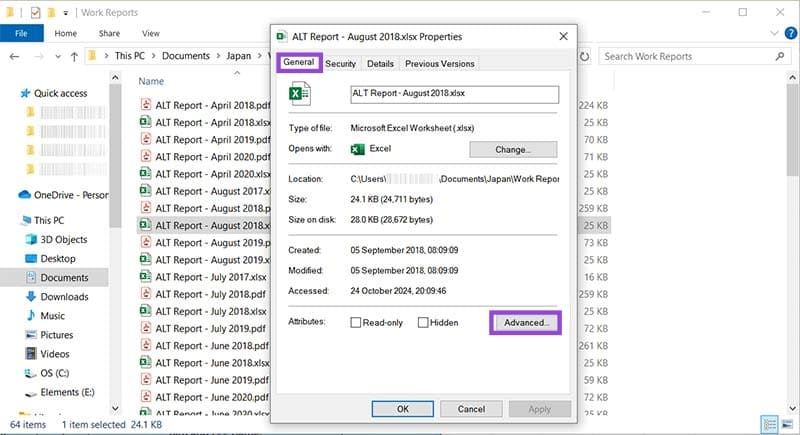
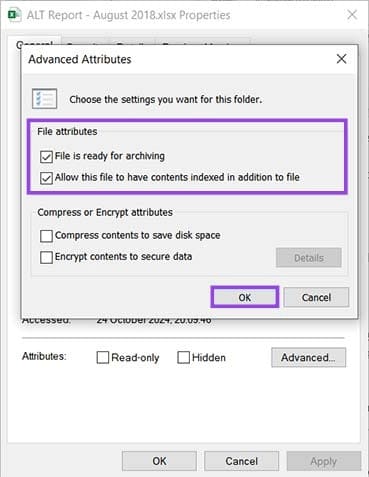
You can also enable archiving and indexing permissions on individual Excel files, if the folder permissions aren’t the problem. The process is very similar to changing permissions for a folder:
- Right click on the Excel file in Windows Explorer and select “Properties”.
- Click the “Advanced” button on the “General” tab.

- In the “Advanced Attributes” window, make sure both boxes of the “File Attributes” subgroup are checked.

- Click “Apply” and then “OK” to save the changes.
Turn Sharing Wizard Back On
If you’re working on a shared document without the Sharing Wizard enabled, you’re bound to run into problems. You’ll have to check your folders to be sure:
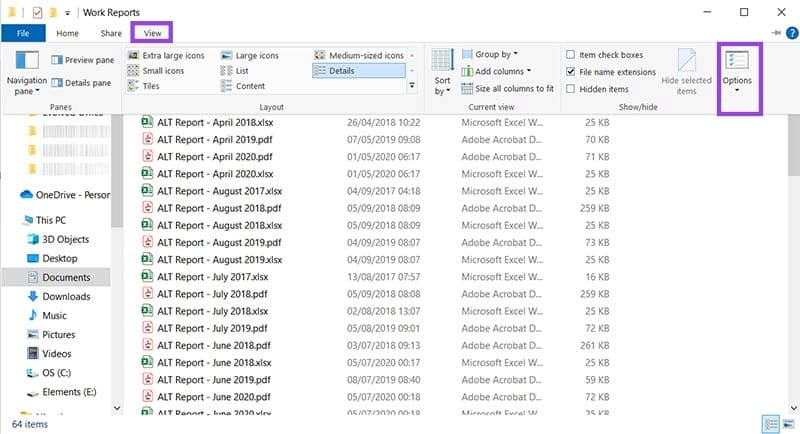
- Open the folder containing your file in File Explorer (press Win + E to open the Explorer).
- Click the “View” tab at the top of the window, which will bring up a collapsible menu.
- Select “Options” on the far right of the window.

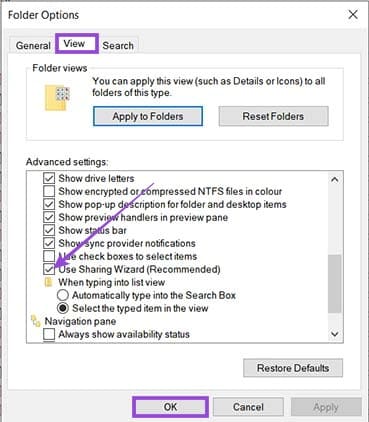
- In the “Folder Options” window that pops up, select the “View tab”.
- Scroll down to “Use Sharing Wizard (Recommended)” and check the box, if it isn’t checked already.

- Hit “Apply” and then “OK” to save the changes.
Save a Copy
If permissions are causing you grief, then another (albeit temporary) fix is to save the file to another folder, preferably locally. Here’s how:
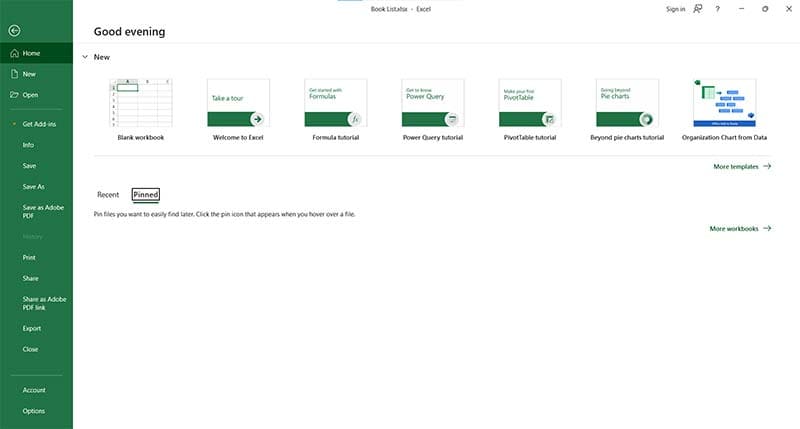
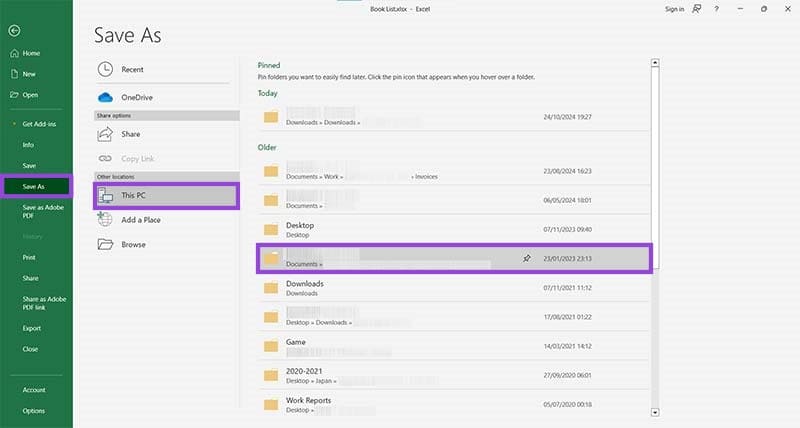
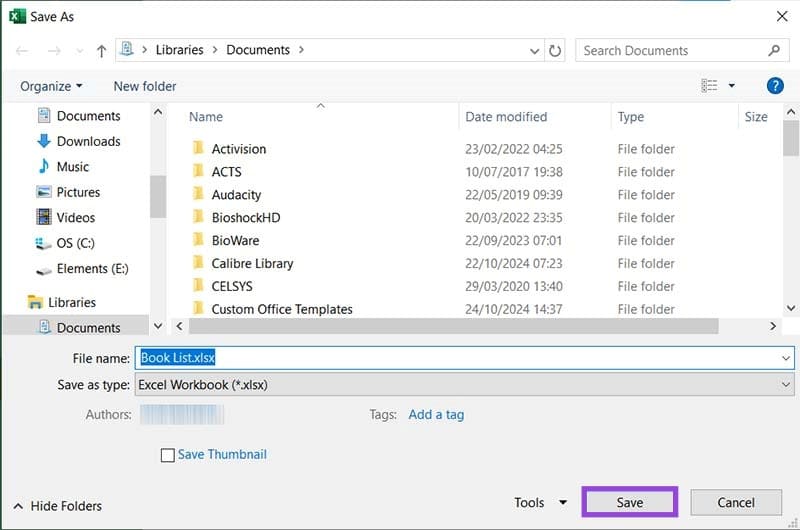
- Select the “File” tab in Excel and choose the “Save As” option from the side menu.

- Choose a folder from the list, or click “Browse” to save via File Explorer.

- After selecting the desired location, click “Save” to save a copy of the file there.

Saving locally is a great way to not lose the changes you’ve made to your file, while you attempt to troubleshoot in other areas. Try this before restarting Excel or your PC.
For good measure, try saving the file with a different name to see if the error disappears.
Save in a Trusted Location
The Trust Center is one way in which Microsoft Office ensures that your files and privacy remain protected. That said, these protections might be what’s keeping you from saving in a particular folder, depending on its access controls. To see which folders are trusted and to add new folders to the list:
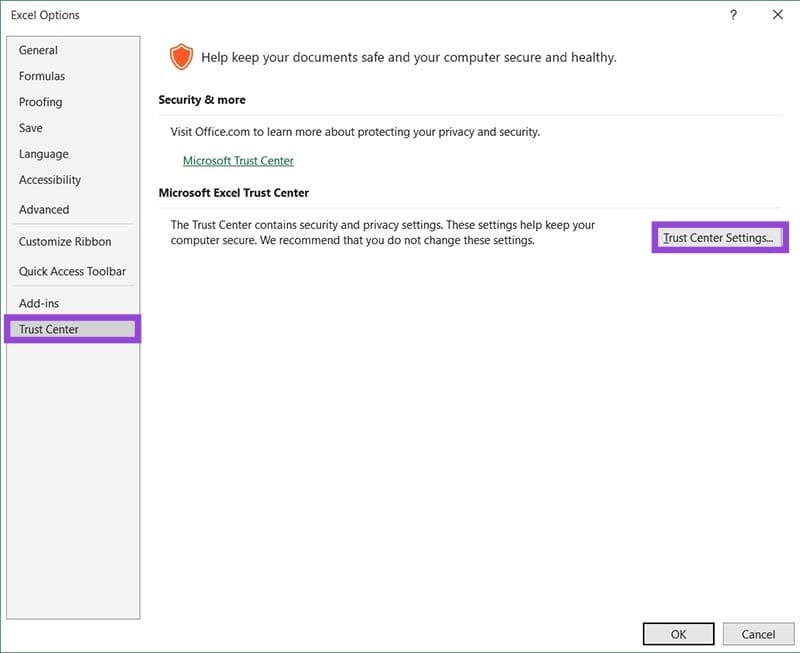
- Click the “File” tab in Excel and select “Options” from the bottom of the side menu.
- Navigate to the “Trust Center” tab and click the “Trust Center Settings” button.

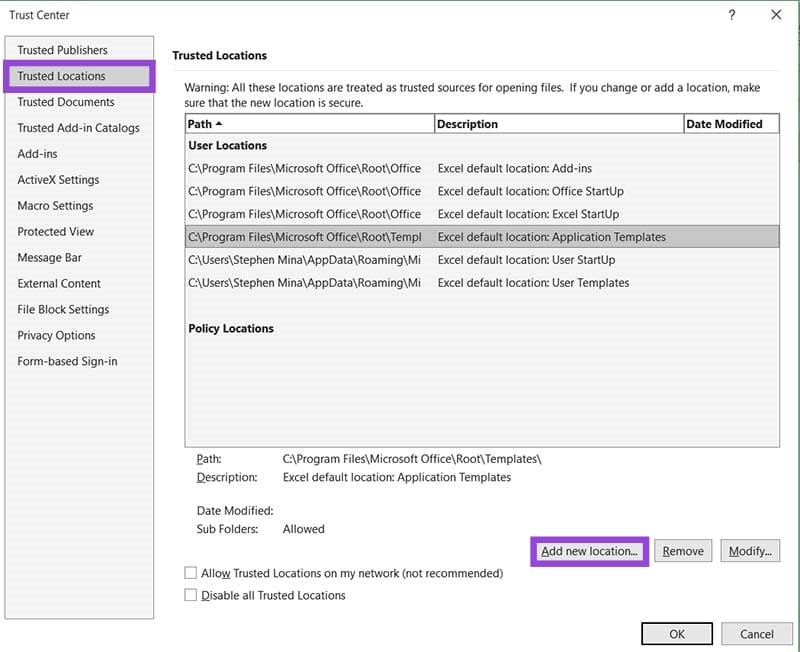
- Open “Trusted Locations” and check if your target folder is in the list.

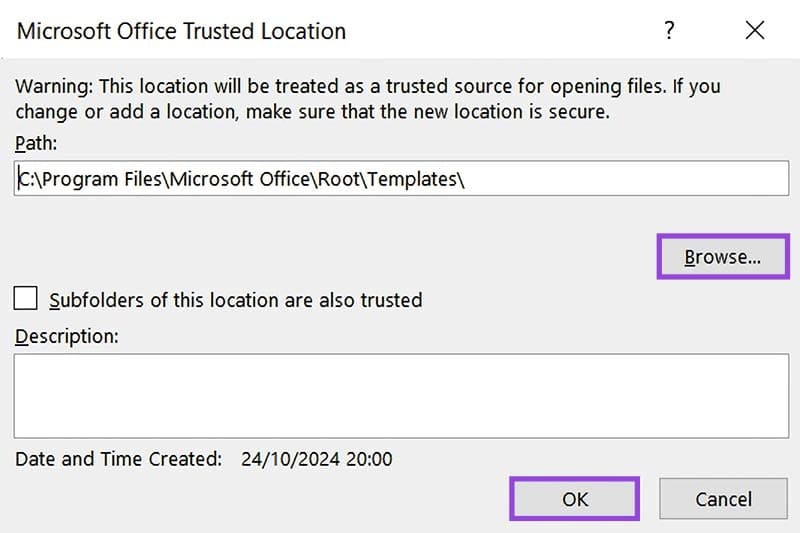
- If it isn’t, click the “Add new location” button and input your target drive manually or by clicking the “Browse” button.

- Click “OK” once you’re done.


