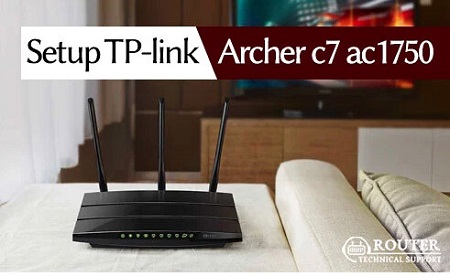
How to Setup a TP-Link AC1750 Without Modem

Some people consider routers and modems the same thing, but that’s not the case. Your modem supplies the internet connection to your router, while your router routes the connection across devices. These routed connections can be cable or Wi-Fi. The number of different routings depends on the router in question.
Without a modem, there’s no internet connection. But can you set up the router without a modem? Well, let’s find out. Here’s how to set up your TP-Link AC1750 without a modem.
Is It Possible
You need to connect your router to a modem if you want to have an internet-connected local network. That much is true. You can’t hope to browse the internet via the router without a modem. However, we’re talking about setting up the router here, not browsing the web.
So, the real question is, can you set up a router without an internet connection? This depends from router to router, but in the case of TP-Link AC1750, it’s definitely possible – the device is set up separately from the internet connection.
How to Setup TP-Link AC1750 Without a Modem?
It’s easy. Just set it up as you normally would. It will require you to use a browser on the device you’re using, but don’t worry, only router connection is necessary.

Use the Ethernet Cable
Before you proceed, we encourage you to connect to the router via an Ethernet cable, as any potential interruption in the Wi-Fi connection can lead to the device being damaged. That said, you can set it up using only Wi-Fi.
Place the Router
Start by placing the router somewhere in proximity to the device you’ll be using to set it up. If you’re using a wireless connection, it’s advisable that there be no walls or objects between the device and the router itself.
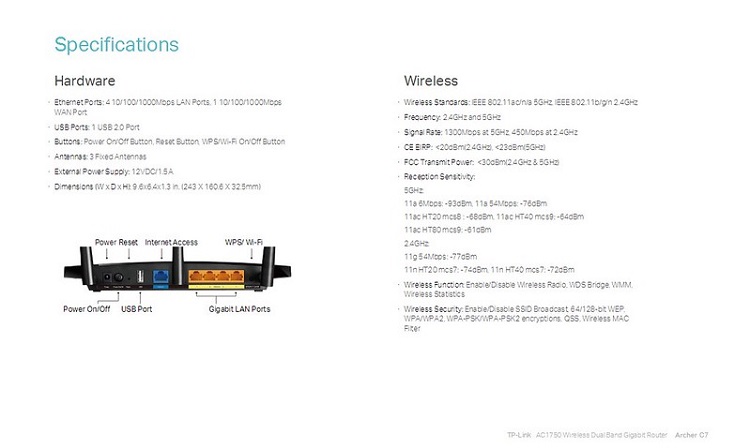
Plug TP-Link AC1750 into the power socket using the provided power cable. The cable jack on the router should be to the far left of its backside. Then, press the Power On/Off switch next to the cable jack on the router’s back and wait until it turns on properly. If this is your first time turning it on, be patient; wait at least five minutes until the startup is complete.
Connect the Device
Now, it’s time to connect the device you’ll be using to set things up to the device itself. If you’re planning on using Wi-Fi, navigate to the device’s network connections list (make sure that the device’s Wi-Fi is turned on) and find the TP-Link AC1750 router. It should be called something like “TP-LINK_xxxxxxx,” where x’s are some seemingly random numbers.
If the router has been custom-named and bought new, we recommend contacting the retailer and asking for a replacement. You don’t want a used router breaking down after a couple of months.
Once you’ve found the router on the list of available Wi-Fi connections, connect to it as you normally would to any other Wi-Fi-based device. The password should be “admin,” but it may not be password-protected to begin with.
Log In
Once you’re connected to the router, open a browser on said device. It doesn’t matter which browser you use, as long as you’re connected to the router. In the browser’s URL box, type in http://tplinkwifi.net and hit Enter.

If the address leads you to a “no internet” page, check the bottom/backside label of the TP-Link AC1750 for the Default Access address.
You’ll be prompted to log in to the router. Don’t worry. Both the default username and password should be “admin,” all in lowercase letters. If this doesn’t work, the password might’ve been disabled. In this instance, use “admin” for the Username box, but leave the Password field empty. Then, hit Enter.
Setting Up the Password
So far, we’ve been dealing with connecting the router to your device. Once you’ve entered the correct username and password, you’re officially in the TP-Link AC1750 setup hub. The first step? Setting up the password, so that you don’t get any stray nearby users. This is very important because the AC1750 has a solid range.
Ideally, your password should be at least 8-12 characters long. All different character types should be used, lowercase letters, uppercase letters, symbols, and numbers. Still, the password should be something unique and easy to remember. Never use obvious passwords, because freeloaders will try different common passwords for hours until they get free internet.
Set Up the Network Name
Now, select the Wireless 2.4GHz option and then click Wireless Settings. Change the Network Name field into something relatable to you. You can use whatever you want here. This is the name that other people will see when looking at the available Wi-Fi list.
TP-Link AC1750 is a dual-band router, meaning that it also has a 5GHz network option. Just set the 5G option up like you did the 2.4G. Start by selecting Wireless 5GHz from the menu.
Connecting to a Modem
Now, you’ve successfully set up your TP-Link AC1750 router. You can tweak more things, but the basic options we’ve covered satisfy most users’ needs. However, your router isn’t internet-capable yet. You’re going to need a modem for this. Once you’ve got your modem set up, connect it to the AC1750.
Then, once the router is internet-worthy, you can use the internet on any device that you connect to it, wirelessly, or using a wire.
Modem-less Setup for TP-Link AC1750
As you can see, there’s nothing special about setting up the AC1750 without a modem. All you need is the router and a device (preferably a laptop) to set it up with. That said, don’t expect to be able to browse the internet based on the router itself. As mentioned, routers route connections to different devices, they don’t supply them. In order to go online, you’re going to need a browser.
Have you managed to set the AC1750 up without using a modem? Did you experience any problems? Let us know in the comments section below.


One thought on “How to Setup a TP-Link AC1750 Without Modem”
Fuck you 1000 times
You are a liar