


How to Turn Off Windows Defender in Windows 10


As a pre-installed anti-virus software, Windows Defender does an excellent job of keeping your PC safe from spyware, viruses, ransomware, and other threats.
But there are times when you’d want to temporarily or permanently disable this software. For instance, specific tasks might be conflicting with the Defender, and you need to disable it to complete the action.
Nevertheless, permanently disabling Windows Defender can be challenging if you’re not using Windows 10 Pro. Let’s dive in.
Turning Off Windows Defender
There are two ways to temporarily turn off the Defender – via Windows Security and via Group Policy. The following sections cover both methods.
Windows Security
Step 1
Launch the Start menu, type Windows Security into the search bar, and click on the top result.
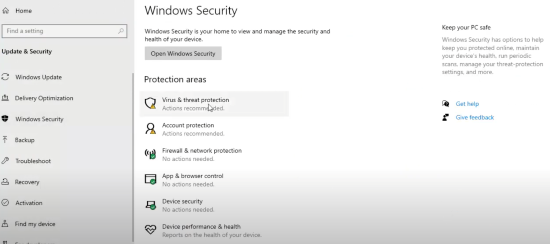
Make sure “Virus & threat protection” is selected, then click on “Manage settings” under “Virus & threat protection settings.”
Step 2
To turn off Windows Defender, click on the button under “Real-time protection” to toggle it off. The action enables you to install any software and make the needed system changes, which the anti-virus previously blocked.
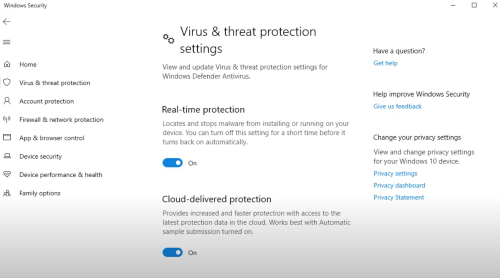
Of course, you can always re-enable the protection by taking the same steps.
Group Policy
If you’re using Windows 10 Pro, Local Group Policy Editor allows you to turn off Windows Defender permanently.
To complete the action, you need to turn off Tamper Protection first. Available since May 2019, this feature safeguards your system from unauthorized changes. To stress, the Defender will turn back on after a restart if you don’t disable Tamper Protection.
Step 1
Navigate to Windows Security, select “Virus & threat protection,” and select “Manage settings” under “Virus & threat protection settings.”
Step 2
In the following window, go to Tamper Protection and click on the button to toggle it off. Now, you can access Group Policy to disable the native anti-virus altogether.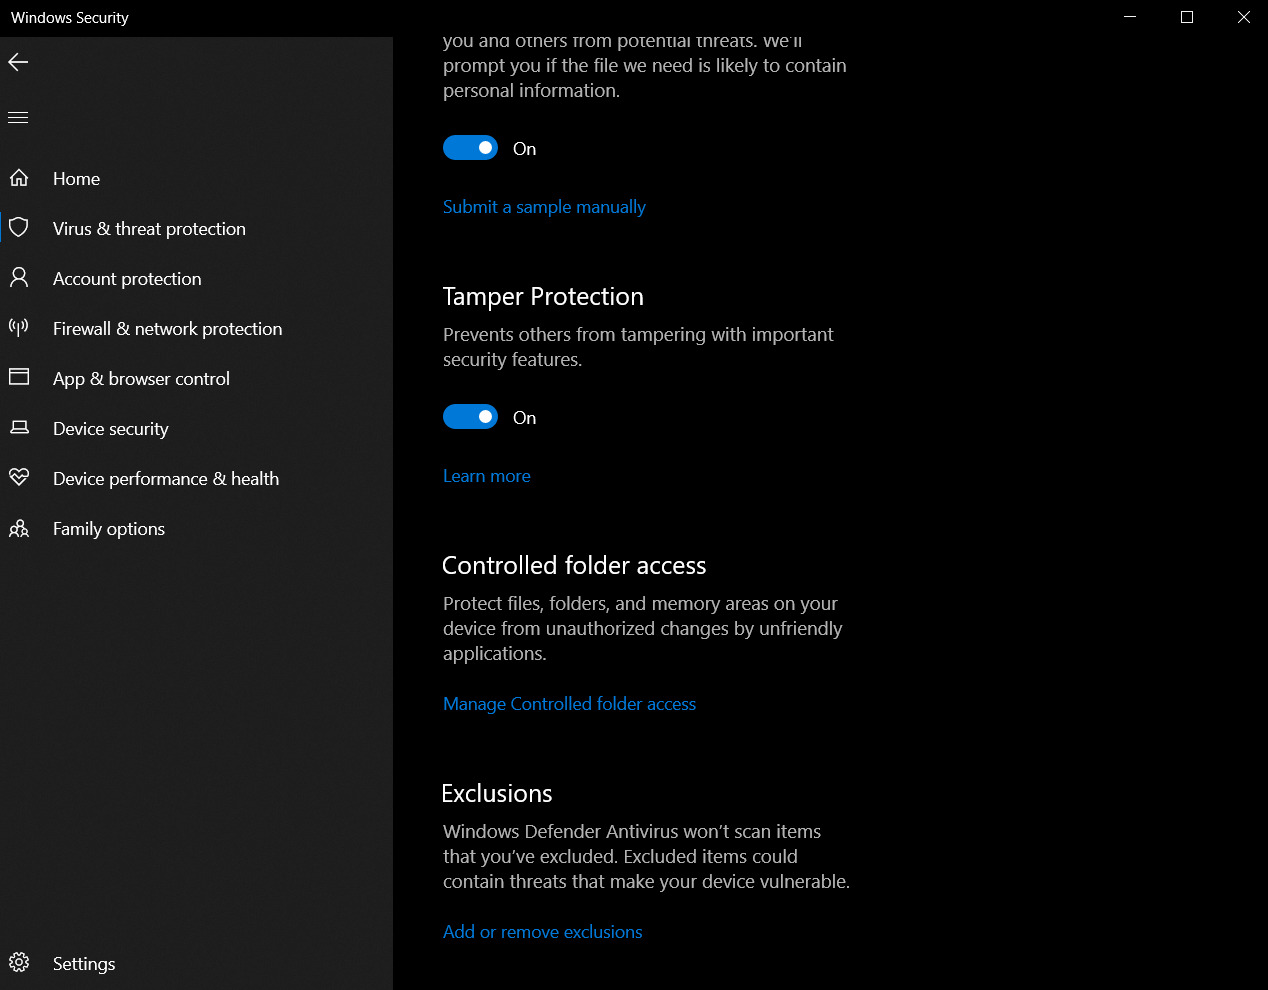
Step 3
Go back to the Start menu and look for gpedit.msc to locate Local Group Policy Editor. Then, you need to take the following path:
Computer Configuration > Administrative Templates > Windows Components > Windows Defender Antivirus
Step 4
Double-click “Turn off Windows Defender Antivirus” to access more actions. Then, choose “Enabled” to turn off Windows Defender. This action might appear counter-intuitive, but the Help section informs you that it’s the right thing to do.
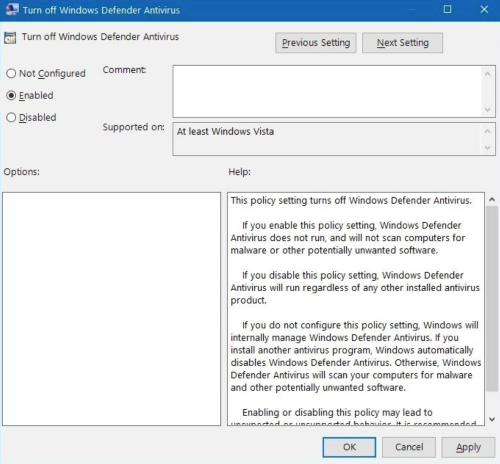
Afterward, select Apply, then OK for the actions to take effect. You can now close the remaining windows and restart your PC.
Important Notes
After that, the built-in anti-virus will remain off indefinitely, but you’ll still be able to see the shield icon in the taskbar. That’s not a surprise because the icon is associated with Windows Security.
To enable the anti-virus, retrace your steps as previously described. But now, you need to select “Not Configured” instead of “Enabled.” You also need to reactivate Tamper Protection and restart your PC for the changes to take effect.
Bonus Method
If you’re not running Windows 10 Pro, you might not be able to access the Local Group Policy Editor. However, you can use Windows Registry to remove Windows Defender permanently.
Step 1
Start by disabling Tamper Protection.
Keep in mind that there is a “TamperProtection Registry” key, and you can find it in the following path:
HKEY_LOCAL_MACHINE\SOFTWARE\Microsoft\Windows Defender\Features
You can easily control this key, but it’s quite tricky to modify it. That’s why it’s not advisable to try to turn off Tamper Protection using the key.
Step 2
Hit the Start menu, type regedit, and access the first option that pops up. Thereon, navigation is as follows.
HKEY_LOCAL_MACHINE\SOFTWARE\Policies\Microsoft\Windows Defender
Once there, right-click Windows Defender (it’s a folder), choose New, then select DWORD (32-bit) Value.
Step 3
Type DisableAntiSpyware under Value Name, and hit Enter. Then, select the Value Data box and change the value to 1. Click OK and restart your PC.
Things to Know
Removing Windows Defender disables native anti-virus protection on your computer. But it’s OK as long as you’re using some third-party solution.
To re-enable the Defender from Windows Registry, repeat the steps from the previous section. Then, locate the DisableAntiSpywre key, and delete it from the system.
As of May 2020, Windows Defender is known as Windows Defender Antivirus. However, the changes in the name do not affect the actions or required steps to disable it.
After a significant software update, the Defender might turn back on. If so, repeat the steps from above to turn it off.
Safety First
Disabling Windows Defender entirely takes more than a few steps indeed. Albeit a bit tedious, this action requires very little advanced knowledge of the system.
Why do you want to disable Windows Defender? Did you notice your PC is slower with the anti-virus software running in the background? Tell us more about your experience in the comments section below.


4 thoughts on “How to Turn Off Windows Defender in Windows 10”