How to add system resource details to the Windows 10 desktop
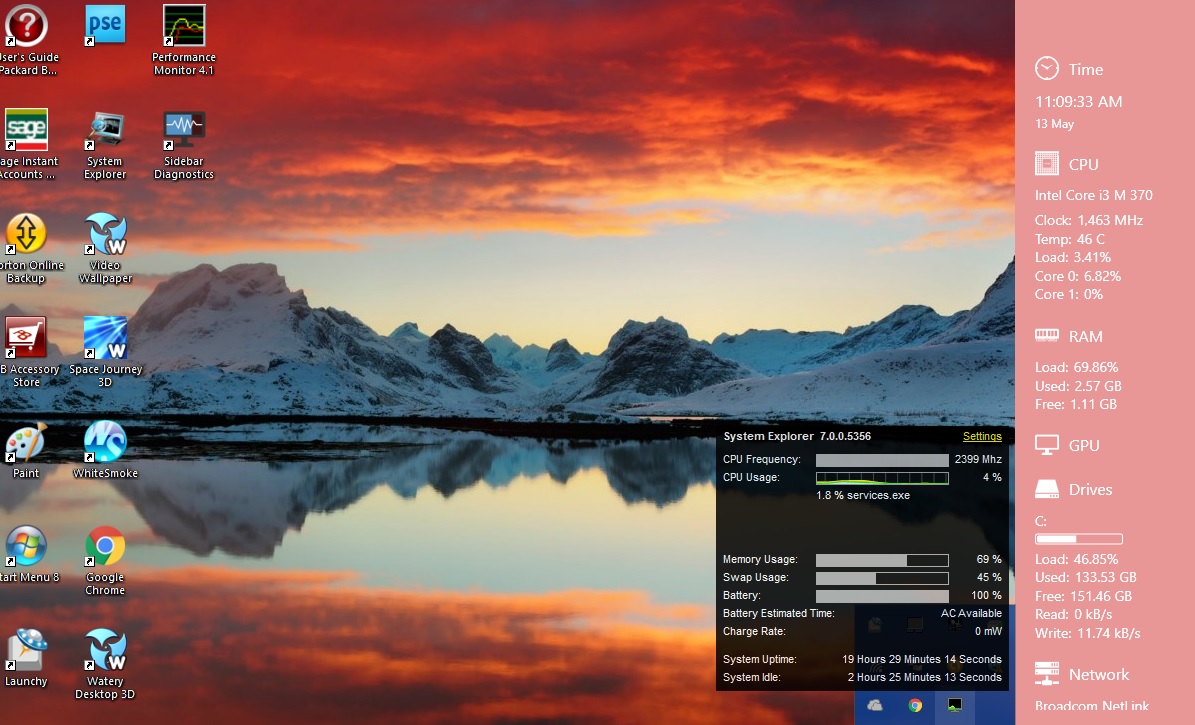
The “Guide to Windows 10 System Tools” article told you about some of the tools that provide system resource details such as RAM usage. However, those system tools don’t show you those details on your desktop. Nevertheless, you can still add system resource monitors to your Windows 10 desktop, taskbar and system tray with a few software packages.
Sidebar Diagnostics
First, check out the Sidebar Diagnostics software package. This is software that adds system details to your desktop with a sidebar. The sidebar shows you RAM, CPU system details and more besides. You can add it to Windows 10 by opening this page and clicking the DOWNLOAD button there. Then open its setup to run through a quick initial setup to open the sidebar in the snapshot below.
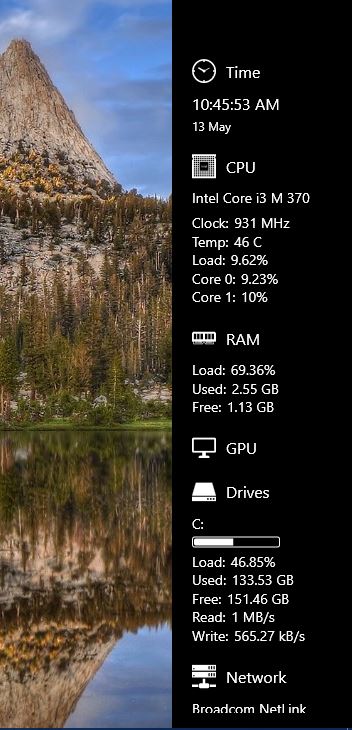
Your new system diagnostics bar includes a variety of resource details on it. At the top there’s a clock, and just below that are CPU resource details. Then there are RAM allocation details that show you your RAM usage. Drive details highlight how much disk storage you’ve used up.
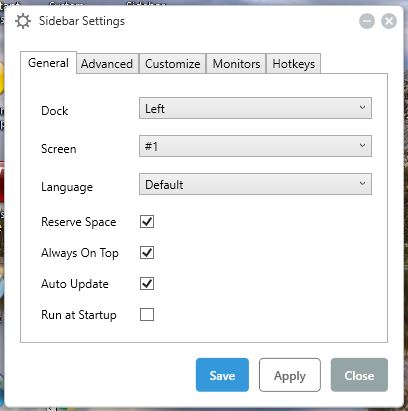
There are a variety of customization options for the sidebar. Click the cog icon at the top of the bar to open the window below. First, you can move the bar to the left of the desktop by selecting the Dock drop-down menu on the General tab and selecting Left.
Click the Customize tab to open the options shown in the shot below. There you can adjust the width of the sidebar by dragging the Sidebar Width bar. Drag the bar further right to expand the width of the sidebar.
To add alternative colors to the sidebar, click the Background Color drop-down menu. That opens a palette from which you can choose a color by dragging the Color of the background bar and then selecting a gradient with the circle. Alternatively, press the Standard button and select one of the color boxes.
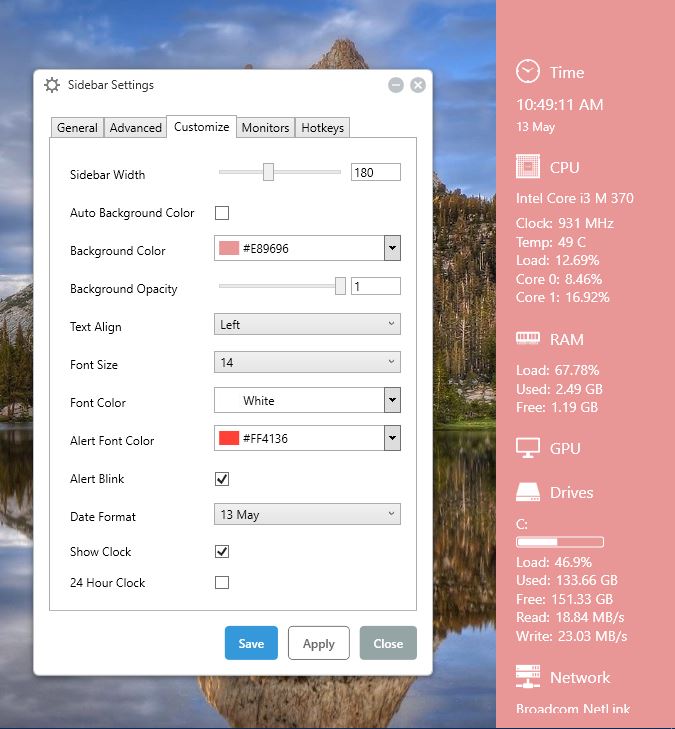
If the fonts don’t match the background colors, click the Font Color drop-down list. Then you can select a color for the sidebar text much the same as the background. Click Apply and Save to save any selected settings.
To customize the sidebar transparency, drag the Background Opacity bar. Drag that bar further to the left to increase the transparency. Or you could drag it to far right to remove any transparency effect.
There are also date and clock options on the Customize tab. Click the Date Format option to open a drop-down menu with alternative formats for the date. Click the 24 Hour Click check box to switch from 12 hour to 24 hour clock.
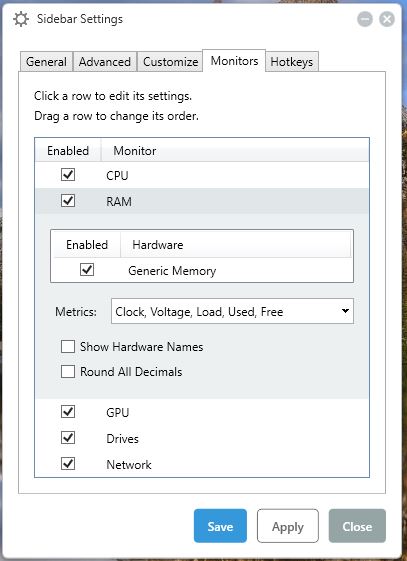
To further customize the monitors on the sidebar, click the Monitors tab. Then you can select CPU, RAM, CPU, Drives or Network. Click one of those to expand extra options for it as shown below.
Taskbar Meters
Taskbar Meters is software that adds three system resource icons to your taskbar. With this you can add a RAM, CPU and disk IO meters to the taskbar. You can save its Zip file from this Softpedia page, and then decompress the Zip by opening it in File Explorer and pressing Extract all. Choose a path to extract the folders to, and open the extracted folder.
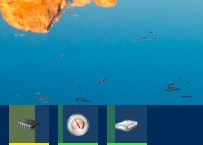
Next, select TaskbarMemoryMeter to open the taskbar icon shown directly below. That’s a taskbar meter icon that shows you how much RAM you’re using. The more color it includes, the more RAM you’re using. So if it’s something like 50% about half the icon will include color on it.

Then you can also select TaskbarDiskIOMeter and TaskbarCpuMeter from the same folder. They add disk IO and CPU icons to the taskbar as below. They show CPU utilization and disk IO latency details.
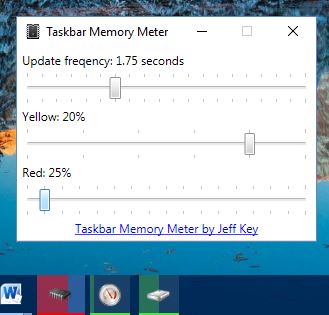
Click on the icons to open the window in the snapshot below. That includes a couple of color bars that you can drag to configure the colors with. Plus there’s also an update frequency bar included in the window.
Performance Monitor
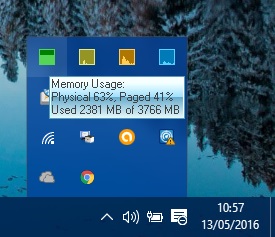
The Performance Monitor adds four system resource icons to your system tray. Click here to open its Softpedia page from which you can save its Zip to windows. Open its setup in the Zip folder to install the software. When it’s running, you’ll find some new system resource icons in the system tray as below (so long as they’re selected in the Settings window). They provide system details for RAM, network, CPU and disk usage.
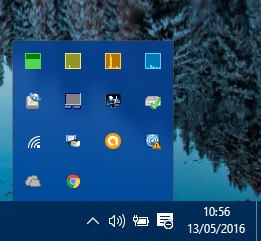
Hovering the cursor over the icons provides further system details as show in the snapshot directly below. For example, the RAM system icon will tell your RAM usage in percentage terms. It will also tell you how many megabytes that amounts to.
You can right-click one of the system resource icons and select Settings to open the window below. That includes four tabs with options for each system resource icon. There you can customize the colors of the tray icons by clicking the Background Color option.
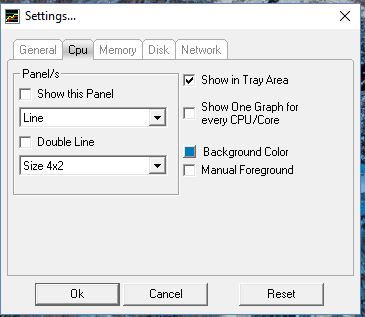
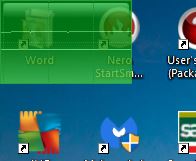
The tabs also include a Show this Panel option. Select that check box to add a graph for the system resource to the top left of the desktop as below. Click the size drop-down menu to adjust the dimensions of each graph, and press the OK button to apply the settings and close the window.
System Explorer
System Explorer is a Task Manager alternative mentioned in this TechJunkie guide. That also adds system resource details to the Windows 10 desktop. When the software is running, you can hover the cursor over its system tray icon to open the system resource details at the bottom right of the desktop.
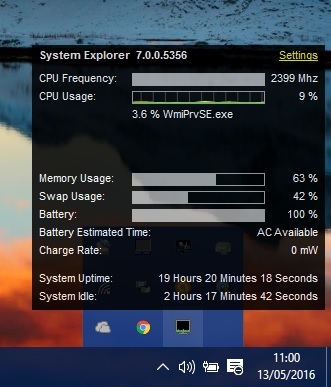
The system resource details included here are similar to the others with RAM and CPU usage shown. However, it also includes a battery usage monitor for laptops. Click Settings at the top right corner of that box to open the menu in shot below.
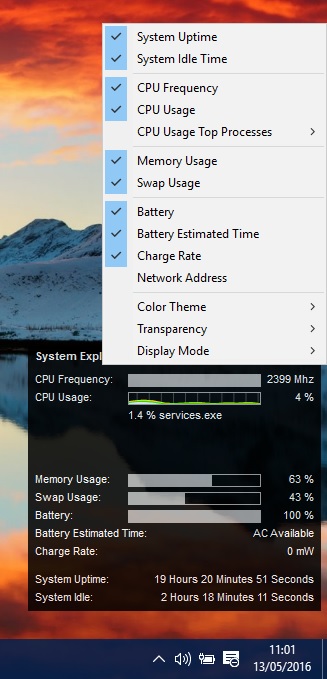
There you can select to add or remove system details from the resource monitor. Select Color Theme and Light to switch the resource monitor background color. Select Transparency and a percentage figure to customize the transparency levels of the resource monitor.
Those are four freeware software packages that add system resource monitors to the Windows 10 desktop. With them you can now quickly check CPU, disk IO, network, RAM and battery system details from your desktop. You can also add more customizable resource monitors to Windows with software such as Rainmeter and Samurize.


One thought on “How to add system resource details to the Windows 10 desktop”