How to Use Split Screen on Mac

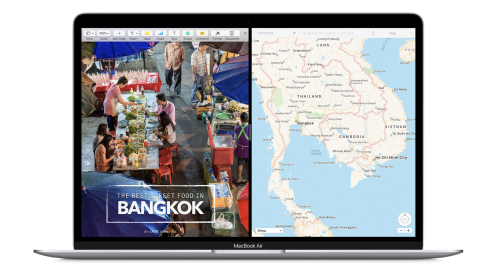
Split-screen is one of macOS’s most useful productivity features, and it doesn’t matter what screen size you have. Be it 13-inch MacBooks or 27-inch iMacs, split-screen is there to maximize the screen real estate and improve your workflow.
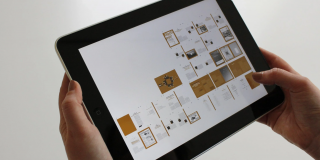
As of recently, split-screen is also available on iPadOS, and it takes the tablets one step closer towards the laptop experience. This write-up teaches you all there is to know about split-screen, plus we’ve included tips for the iPad Pro.
Before You Start
Apple dubbed this option Split View, and this is how the article will refer to it going forward. It has been available since OS X El Capitan and should be on by default. But it wouldn’t hurt to double-check anyway.

Click on the Apple menu at the far left of the macOS taskbar and choose System Preferences. Choose Mission Control, and inspect if the “Displays have separate Spaces” option is on.
Tip: For quick access, press Cmd+Space, type Mission Control, and the app will appear under Top Hits.
Using the Split Screen
The following sections provide explanations for macOS Catalina as well as previous software iterations.
Catalina
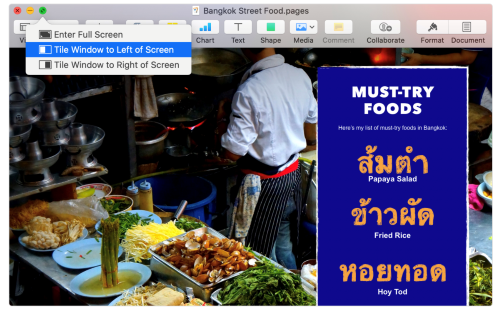
Hover your cursor over the full-screen button within an app window. A tiny drop-down menu appears, and you can choose three different options.
- Enter Full Screen
- Tile Window to Left of Screen
- Tile Window to Right of Screen

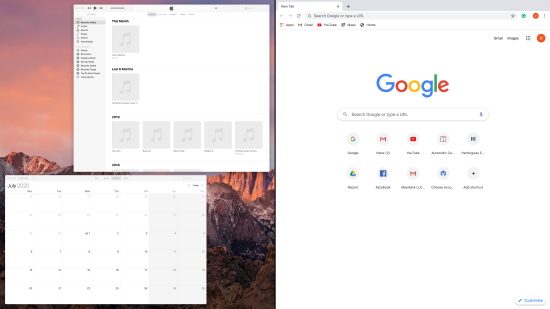
Choose the side where you want the window to be, and click on another app window within the empty tile. It snaps right into place, and you’re ready to go.
Quick Note: Clicking or holding the full-screen button also reveals the three options, but you can’t drag the shrunken window to snap it in place. You need to choose the desired positioning.
Older MacOS Versions
As hinted, you should click, then hold the full-screen button to enter the Split View. You’ll see that the app window shrinks down, and you can drag it left or right to snap to tile. Once you release it, pick another one for the other half.
To select a window for an empty tile, hover your cursor over it and click. macOS neatly stacks the windows on top of each other for easy access. If you change your mind midway through the process, just click on empty space within the free tile and everything will snap back to normal.
Split View Tips and Tricks
Regardless of the macOS version, you can reveal the menu bar by positioning the cursor towards the top of an app window. If you wish to switch the window position, click and hold the window outline and drag it left or right.
By default, split-view windows take equal screen estate. To make one larger, grab the split line in the middle and move it to the left or right.
Both windows open in a new desktop, and there is no limit on how many new split-view desktops you can have. To return to the main desktop, use the multi-touch gesture. If you forgot it, you need to do a two-finger swipe on the trackpad or magic mouse.

Navigation and usage of both split-view windows are seamless. Move the cursor, and the system knows which app you’d like to use. To exit completely, click once on the full-screen window, and it’ll snap back to your main desktop.
However, the other split-view window will expand to full screen, and you need to go back and shrink it down by clicking on the corresponding button.
Split View on iPad Pro
Using Split View on iPad is intuitive, and interactions take cues from macOS.
Launch an app, then swipe from the bottom to reveal the Dock. Press and hold the other app you’d like to open, then drag it to the desired side of the screen (right or left edge). The two apps will snap into Split View.
You can easily switch from Split View to Slide Over. To do that, swipe down from one of the apps. When you want to close one of the windows, move the divider over the window you no longer need.
The neat thing about it is that you get to drag and drop between Split View windows. For instance, you can add photos to your email, or copy-paste pieces of text into Notes.
To select an item, press onto it until it lifts from the app, then drag it to the desired position. You can also drag and drop multiple images and other files, but the action requires some practice.
Namely, you tap and hold one item, move it slightly, then use another finger to pick up more items. There is a badge that indicates how many things you’ve selected.
Split Screens Not Hair
Split View is one of those features that gets under your skin. And rest assured, it will become the go-to option for all who need to multitask. The best thing is that the iPadOS’s Split View genuinely improves on some limitations of macOS.
Would you like to see Split View on iPhone? Are there any third-party Split View apps you know and use? Share your preferences in the comments section below.


