How To Use Windows 10’s Built-In Disk Cleanup App

Computers can get bogged down with junk quite easily, whether that be from temporary files, recycle bin files, old system files, and plenty of other things. This can reduce performance drastically, and that’s why it’s a good practice to run a disk cleanup every so often.
Fortunately, Windows 10 has a Disk Cleanup application built-in so that you can quickly and easily cleanup and optimize your PC for better speeds. And we’re going to show you how to use it!
How to use Disk Cleanup
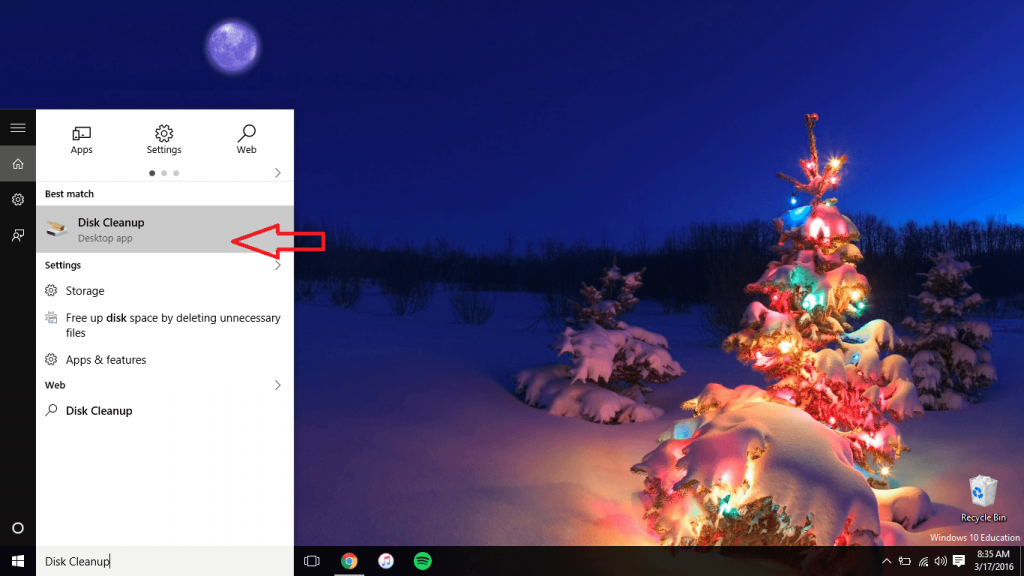
First off, you’re going to want to type “disk cleanup” in the search bar and click on the Disk Cleanup app that shows up, as pictured above.
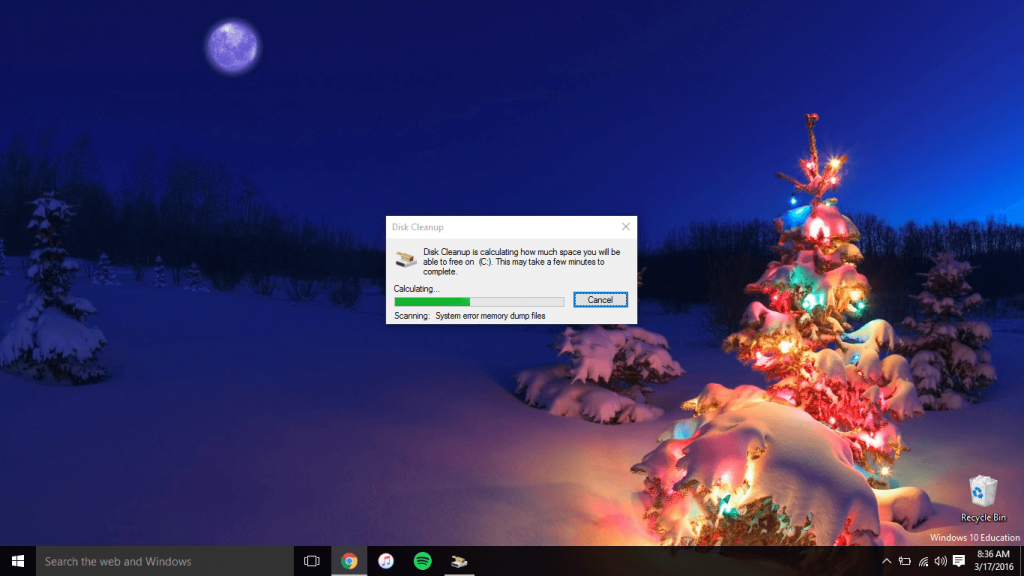
Next, you’re going to have to wait a few minutes as Disk Cleanup calculates how much space it can free up. This may take a little bit of time depending on how many files need to be cleaned up.
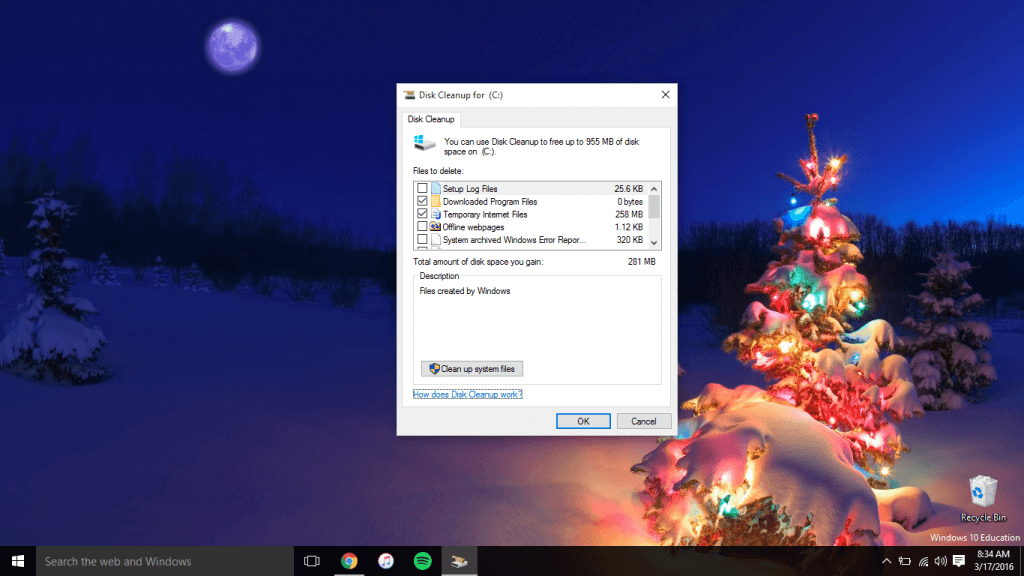
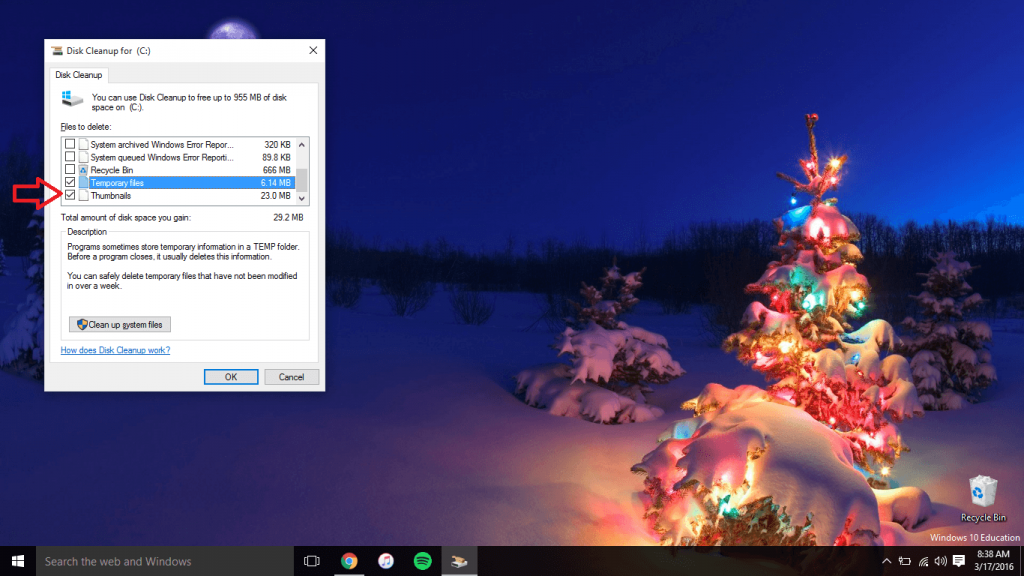
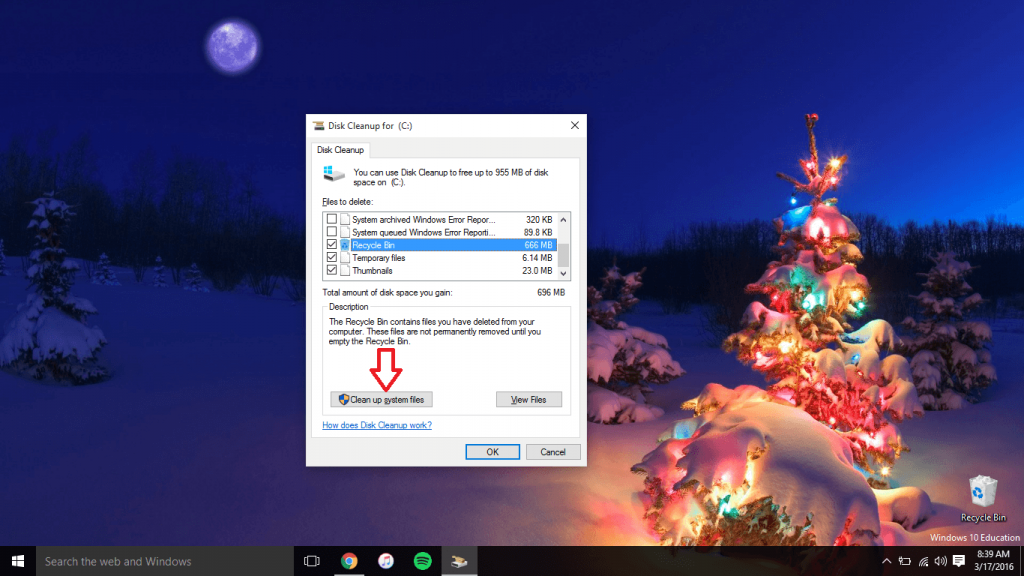
Once it has finished calculating, you can go through and select and de-select what types of files you want deleted, as shown above.
After you’ve finished selecting the types of files you want cleaned up, press the “Clean up system files” button.
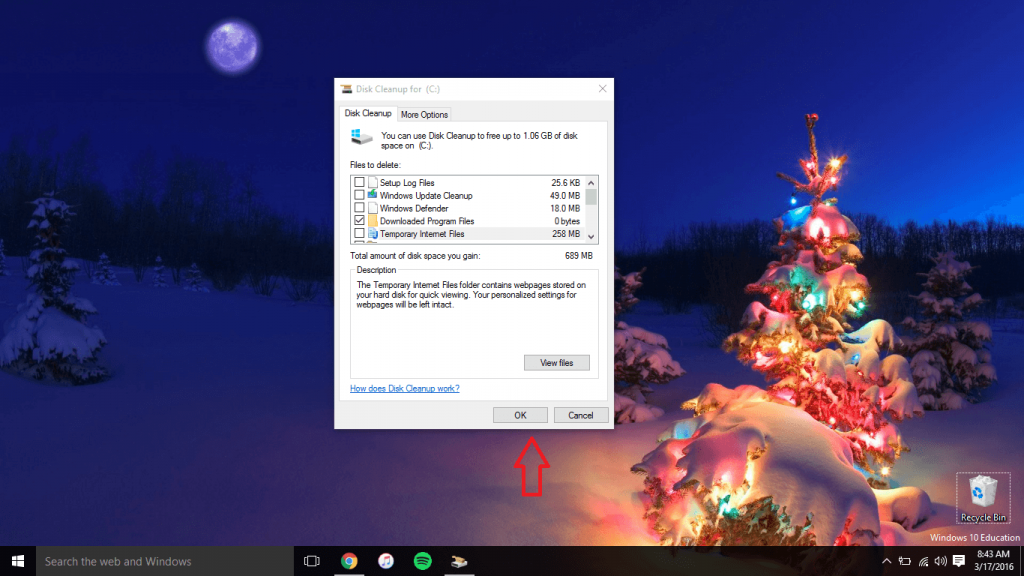
Once it goes through that process, select “OK.”
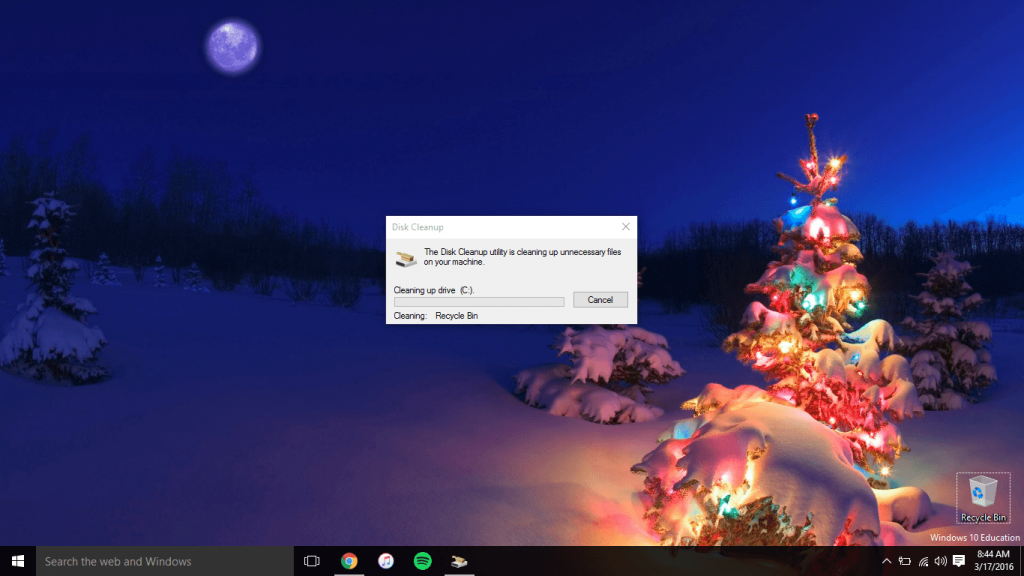
Finally, you’ll see the above screen pop-up, saying that it’s cleaning up all of your files.
And that’s all there is to it! Not only have you taken back all of that unnecessary space from old files, but you’ve also sped up your computer, even if it’s the slightest bit.
Got stuck? Be sure to leave a comment below or over in the PCMech Forums and we’d be happy to help!


