How To Vectorize an Image in Illustrator
Vector images are basically lines and shapes with dynamic color sections. The image quality stays the same when you scale them, which is their main advantage over rasterized static images.
Sometimes it is necessary to switch a regular image to a dynamic vector. For example, if you can’t afford to lose quality when you enlarge an image. You’ll want to turn it into a vector.
And what better way to do it than with Adobe Illustrator, the undisputed king of vector graphics editing apps?
This article will explain how to vectorize an image in Adobe Illustrator, along with some tips to achieve the best possible result.
Step 1: Choose an Image
The first step would be to an image file to convert. You can expect different results depending on the image quality, resolution, and background.
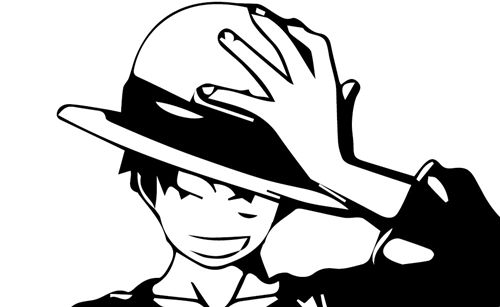
For the best result, you should find an image that has a white background or no background at all, and at a reasonable resolution (vector graphics is not about resolution). The image should be a single subject without a lot of details.
Needless to say, the larger the image, the longer it’ll take to convert and the more memory it’ll use up in the process.
So, assuming you your image, go and open it in Adobe Illustrator. Follow these steps:
- Open Adobe Illustrator.
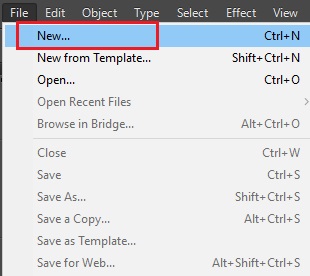
- Click on ‘File’ on the menu bar.
- Select ‘New’ to open a blank canvas.

- Choose the format and press ‘OK.’
- Click on ‘File’ again.
- This time select ‘Open.’

- Navigate to your picture.
- Click ‘Open’ to load it.
Different Image Trace Types
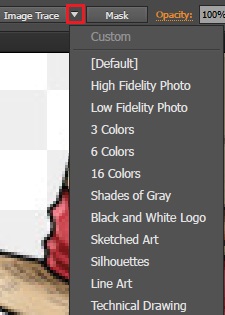
Adobe Illustrator will automatically vectorize your image with the ‘Image Trace’ tool. However, you’ll have to specify the preset for this. Pick the image trace type that’s the closest to the image that you want to vectorize.
- High Fidelity and Low Fidelity are ideal for photos, artwork, and images with a lot of details. High Fidelity will produce a very detailed vector image, while Low Fidelity will produce fewer details. Low Fidelity is generally better for lower resolution images.

- 3, 6, and 9 colors are the preferred presets for logos and artworks that use fewer colors.

- Shades of Gray will make a greyscale image.

- The Black and White Logo preset uses only these two colors to vectorize the image.

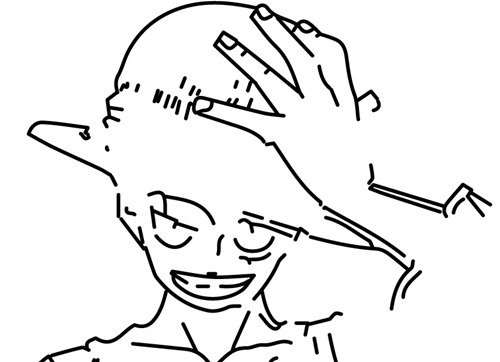
- Sketched Art, Technical Drawing, Line Art, and Silhouettes are presets that you should use for line-based drawings.

- To summarize, choose the preset depending on the image that you want to vectorize. Don’t be afraid to go back and do it again if it didn’t work out.
Step 2: Vectorize The Image
Now that you have your pixelated image and image trace preset, it is time to vectorize the image. Here’s how to do it:
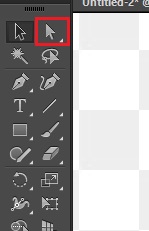
- Select your image with the ‘Selection’ tool and adjust its position.

- Click on the small triangle icon next to ‘Image Trace’ to open the list of presets.
- Choose your preferred image trace preset.

- Wait for Illustrator to vectorize the image.
Step 3: Work the Details and Save the Image
When Illustrator finishes, you can further tweak your image. Open the image trace panel from the toolbox to see more options. Select ‘Mode’ to switch between color groups and adjust the ‘Color’ bar to make the vector more or less detailed.
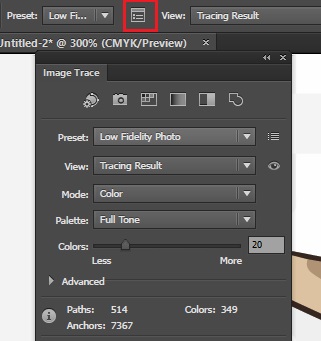
Next, click the ‘Expand’ button on the toolbar to see all the composite shapes that form the full vector image.

Right click on the image and select the ‘Ungroup’ option to split into individual vectors.
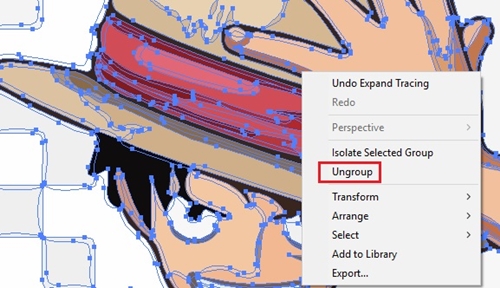
After ungrouping, you can double-click on each vector to modify it as you wish. You can move it or delete it from the image, transform it, etc.
Saving the Image
When you’re done tuning your vector image, it’s time to save it. The available formats are SVG, AI, EPS, PDF, and many others. You’ll want to save it in AI if you think you may have to tweak the vector graphics in Illustrator.
To save the image, you should:
- Click on the file button.
- Select ‘Export.’

- Choose one of the available formats. For example, SVG.

Got to Vectorize Them All
As you can see, vectorizing an image with Adobe Illustrator is pretty straightforward. Now that you know how to do it, you can try it out on different pictures to get familiar with presets.
Also, if you have some drawings or sketches lying, you can vectorize them too. So, what is your purpose for turning your image into vector graphics?


