Windows 10: Increase Taskbar Transparency via the Registry
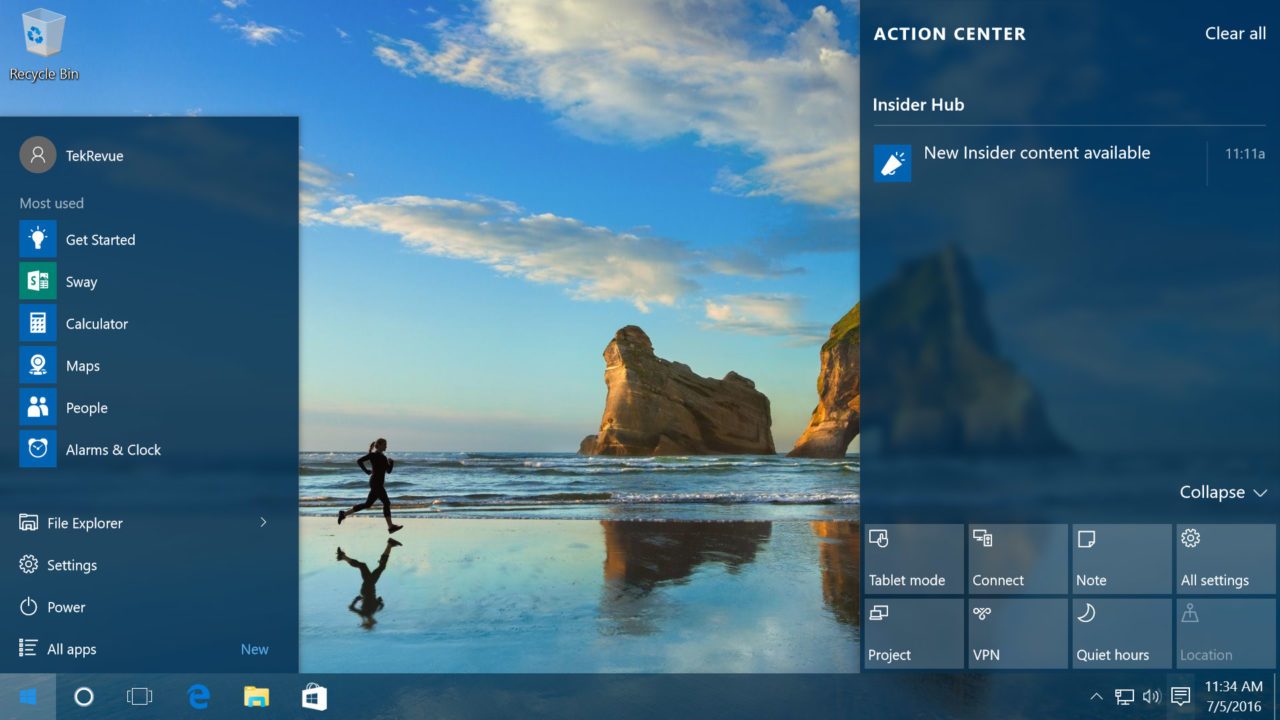
Windows 10 has a lot of customization options for the desktop interface and we’ve previously discussed the options that allow users with compatible hardware to enable or disable a slight transparency effect for certain elements of the user interface. However, this technique has only a minimal effect on the actual visual impact of your taskbar, providing very little real translucency. This means that it is not very effective for revealing the user’s wallpaper or apps positioned beneath the taskbar. However, there are some options that allow you to increase the translucency of the taskbar past the normal built in settings. In this article I will show you two basic approaches to doing this.
How Do I Increase The Transparency Of My Taskbar In Windows 10?
There are multiple ways to change the transparency of your taskbar, including going into your registry or using other programs. We’ve picked the most straightforward ways to do this. The first thing to try is within the confines of Windows 10 itself. To do this, you can go though the “Personalize” tab and use the settings there, but when you turn the transparency on it makes very little noticeable difference.
If you want your taskbar to be noticeably transparent, follow the directions for our alternate methods below.
Change Taskbar Transparency Using The Registry
Windows 10, like all previous versions of Windows, relies on a database called the “Registry” to configure tens of thousands (if not more) low-level configuration options for Windows and its many software applications. Because the registry is so critical to the proper function of Windows 10, it is vitally important to be very very careful when editing it as you can easily brick your system with an ill-advised registry change. Don’t make registry changes suggested by websites you don’t trust, and be cautious even when making any changes that you DO trust. We suggest that before making major changes it is in your best interest to set a restore point within Windows 10 and make a system backup just in case.
Editing the registry itself is a deceptively simple process. Click on the start button, or click in the search bar, and type “regedit.” The Registry Editor will appear in the list of results; click on it to launch the utility.
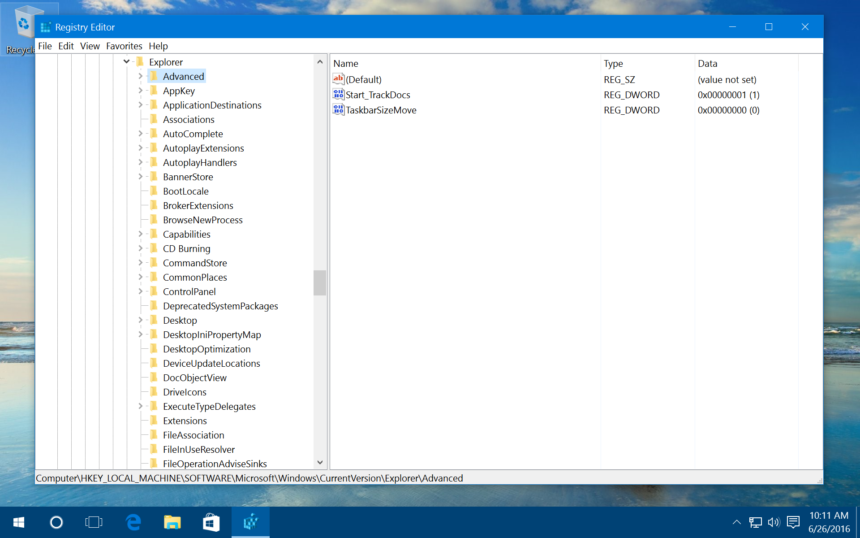
From the Windows Registry Editor, use the hierarchical list on the left side of the window to navigate to:
HKEY_LOCAL_MACHINE\SOFTWAR\EMicrosoft\Windows\CurrentVersion\Explorer\Advanced
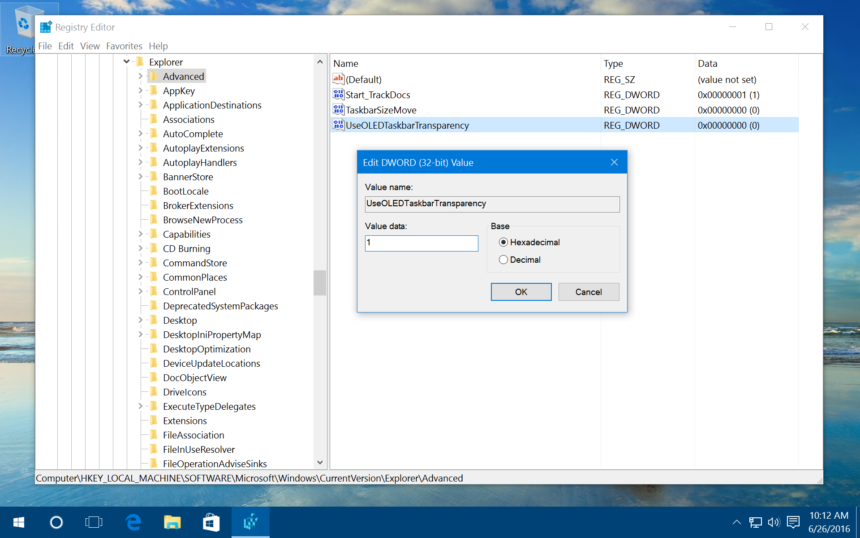
Once you’ve selected the “Advanced” key on the left of the window, right-click in an empty portion of the right side of the window and select “New > DWORD (32-bit)” value and name it “UseOLEDTaskbarTransparency”.
Next, double-click on your new DWORD value and, in the box that appears, set its Value Data field to the number one (“1”). Click OK to close the value editor and then quit the Registry Editor.
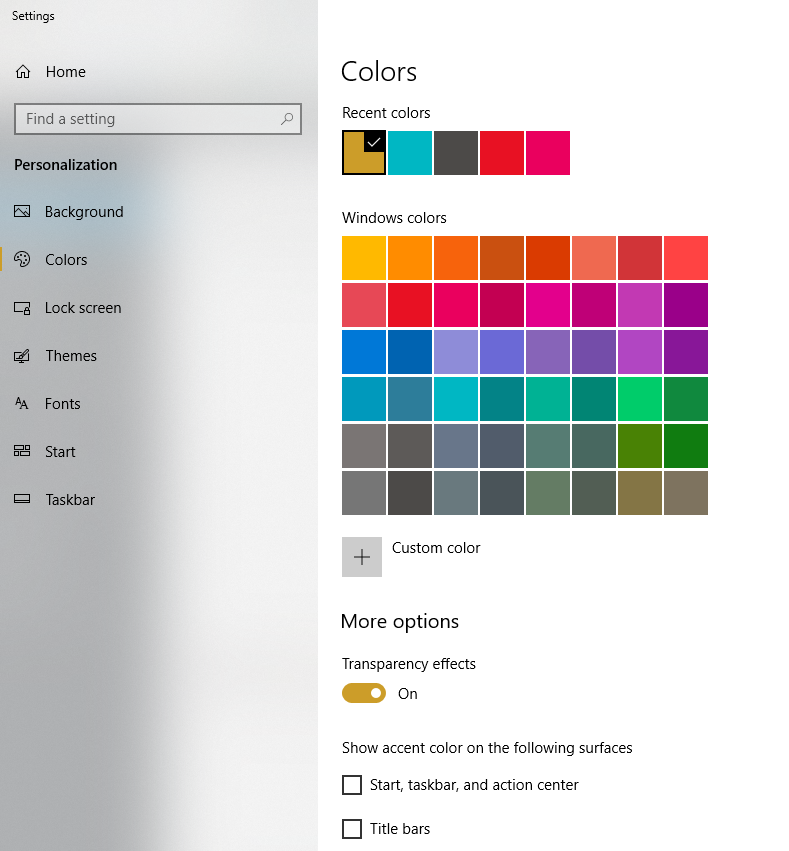
Return to your Windows 10 desktop, right-click on an empty space and select Personalize. Alternatively, you can click Start > Settings > Personalization. From the Personalization section of Settings, click Colors. From the Colors window, enable “Transparency Effects”. If this option was already enabled, then quickly toggle it by disabling and re-enabling it for the change to take effect.
The result of the increased taskbar transparency will vary depending on your accent color choice and desktop wallpaper image, but you should see a small but noticeable decrease in opacity, removing a potential visual distraction for some users and allowing you to more clearly enjoy your desktop wallpaper image from edge to edge of your display.
If you don’t like this new “high transparency” look, just head back to the same Registry Editor location identified above, double-click on the UseOLEDTaskbarTransparency entry, and change the “1” (one) back to the default “0” (zero). Then toggle the “Transparency Effects” setting again and your Windows 10 taskbar will return to its default level of translucency.
Change Taskbar Transparency Using Classic Shell
The steps above involve using built-in Windows settings to increase the translucency of the taskbar, but if you want more control over the exact level of translucency, or if you’d like to make the taskbar completely transparent, you can turn to a free third party tool called Classic Shell.
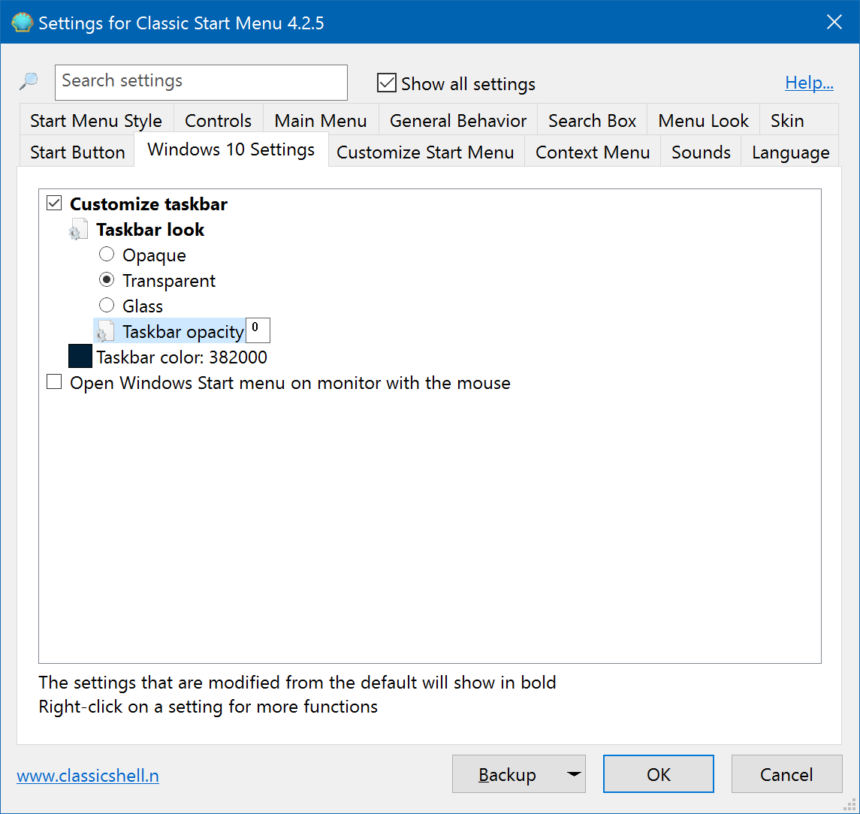
Classic Shell is a great utility with hundreds of useful options for customizing the look and feel of Windows, but one of its many customizations is the ability to not only switch between a transparent and opaque taskbar but to set the exact percent of transparency you desire for the taskbar as well. Just download and install Classic Shell using the link provided, launch the included Classic Start Menu module, and click on the “Windows 10 Settings” tab.
Here, you’ll see several options for enabling or disabling taskbar transparency altogether, setting a custom color value and, most importantly for our current purposes, a percentage value for “Taskbar Opacity”. To change this value, first check the box labeled “Customize Taskbar” and then choose Transparent.
How Do I Make My Taskbar 100% Transparent?
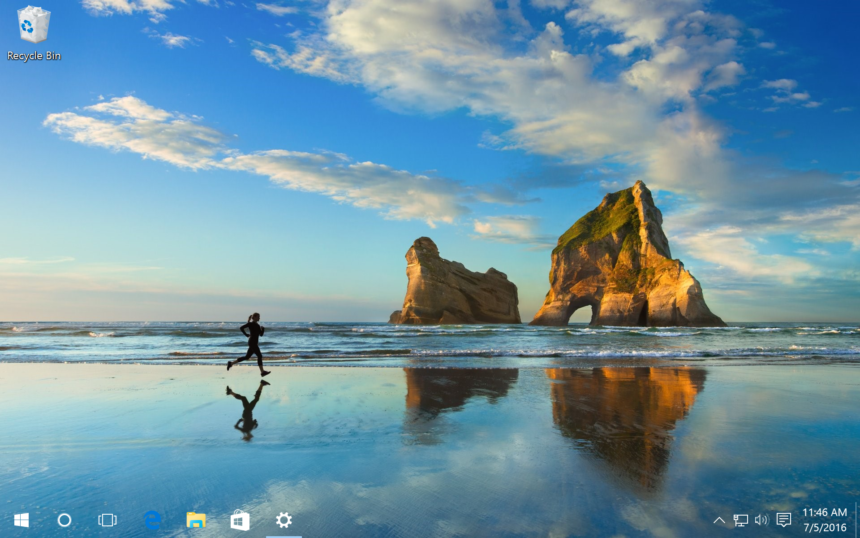
Set the value in the “Taskbar Opacity” box to between 0 and 100, with 0 representing a completely transparent taskbar and 100 representing a completely opaque taskbar. Once you’ve made your change, click “OK” and you’ll see your taskbar transparency change immediately. In the example screenshot above, we set the opacity value to zero, resulting in a completely transparent taskbar.
Is There An Easier Way To Make The Taskbar 100% Transparent?
Unfortunately, no. Updates may come in the future that will make it possible to make your taskbar completely transparent without all of this registry editing or need for external resources. Until then, you’ll have to go the long way around.




9 thoughts on “Windows 10: Increase Taskbar Transparency via the Registry”
“HKEY_LOCAL_MACHINE\SOFTWARE\Microsoft\Windows\CurrentVersion\Explorer\Advanced”
Rainmeter along with more transparent taskbar looks pretty awesome!
Thank you so much :D
Windows 10 Pro: Version 1703: OS Build 15063.0