How to Fix Windows Update Error 0x80240017
Self-updating software seems like sorcery to those of us old enough to remember when updating your operating system meant at best a day spent watching progress bars creep across screens, hair-pulling and weeping at worst. The modern ability of operating systems to continually patch themselves is little short of miraculous. However, no process is perfect, and even an extensively tested updater like the Windows Update software has its issues.
One error that has sometimes popped up during a Windows Update session is Error 0x80240017. This error comes up during Windows Update and stops the process dead in its tracks. Fortunately, this error is relatively easy to fix, although one of the methods does involve a bit of typing in the command prompt.
There are three basic approaches to handle error 0x80240017 in Windows 10 if it pops up during an update.
Method One: Use the Windows Update Troubleshooter
The troubleshooters in Windows 10 are actually pretty good and are so much better than in previous versions. This is also the least intrusive fix for error 0x80240017 so is a logical place to begin.
- Type ‘troubleshooting’ into the Search Windows (Cortana) box.
- Select ‘View all’ in the left pane of the new window.
- Select Windows Update
- Click Next and allow the troubleshooter to work its magic.
Once complete, the Windows Update Troubleshooter will either tell you it couldn’t find anything wrong or that it fixed the issue. If it’s the latter, retest Windows Update. If it found nothing, move on to the next fix.
Method Two: Reset the Windows Update component
Resetting the Windows Update component wipes the slate clean and should cause Windows to begin the update process again. It will check what updates it has, what updates it needs and download and install as needed.
Here’s how to reset Windows Update.
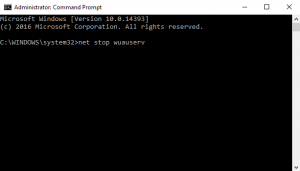
Open a Command Prompt as an administrator and type or paste the following commands. Press Enter after each command.
- net stop wuauserv
- net stop cryptSvc
- net stop bits
- net stop msiserver
- ren C:\Windows\SoftwareDistribution SoftwareDistribution.old
- ren C:\Windows\System32\catroot2 Catroot2.old
- net start wuauserv
- net start cryptSvc
- net start bits
- net start msiserver
Once finished, reboot your computer for changes to take effect. Once back up and running, retest Windows Update to see if the error reoccurs.
Method Three: Reset the Background Intelligent Transfer Service
Windows 10 Background Intelligent Transfer Service is what downloads and manages the updates. By resetting and manually deleting any files it has downloaded, we force the update to retry and hopefully work this time.
Open a Command Prompt as an administrator and type or paste the following commands. Press Enter after each command.
- net stop wuauserv
- net stop bits
Keep the Command Prompt window open for now. Then navigate to C:\Windows\SoftwareDistribution and delete the contents of the folder.
Go back to the Command Prompt windows and type or paste the following, pressing enter after each command.
- net start wuauserv
- net start bits
Retry Windows Update to see if it works.
Do you have any other techniques for fixing this error? If you do, share them with us in the comments below!


