How To Fix ‘your account has been disabled’ Errors in Windows 10

You turn on your computer and are greeted with the sign-in screen and the message ‘Your account has been disabled. Please see your system administrator’. Now what do you do? You have a busy day, things need to get done and you can’t even log into your computer. Fortunately, while serious on the surface this error is actually quite straightforward to fix.
The error occurs either when the administrator account is disabled on the computer or when your profile has been corrupted. The latter is actually quite common Windows 10 and features frequently in the requests for help we receive here at Technjunkie. Fortunately, it is one of the easier errors to fix.

Fix ‘your account has been disabled’ errors in Windows 10
If you can log into the computer using a different account, try the first fix. If you cannot, try the second.
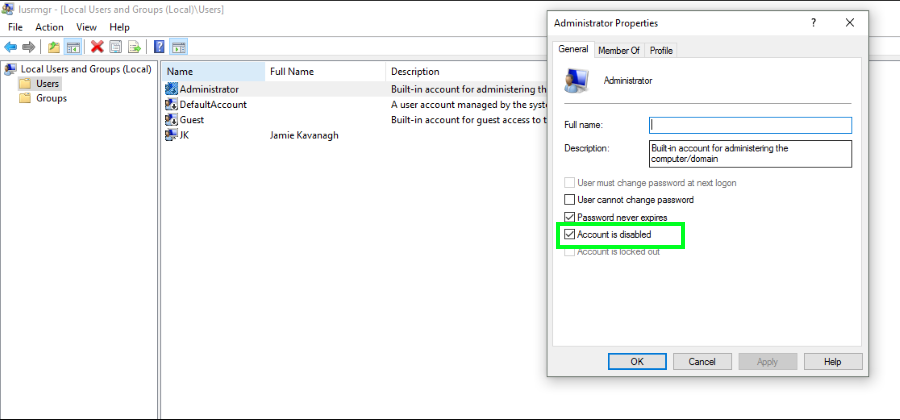
- Type ‘lusrmgr.msc’ into the Search Windows (Cortana) box.
- Click Users in the left pane to bring up all installed users on the machine.
- Select the account you usually use and look for a small circle with an arrow pointing down. This indicates a disabled account.
- Double click the account and uncheck the box next to ‘Account is disabled’.
- Log out of the computer or reboot and log back in using your account.
If you don’t have access to a secondary login, try this:
- Reboot your computer from your Windows installation media.
- Select Repair my computer instead of Install when prompted.
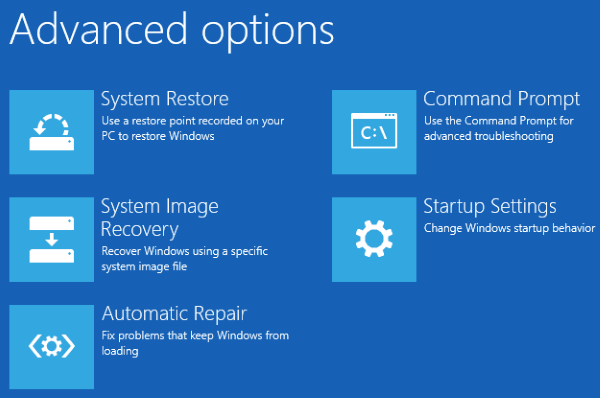
- Select Troubleshoot, Advanced and then Startup Settings.
- Press F5 to enable Safe Mode with Networking.
- Once loaded into the desktop, try steps 1 – 5 above to check whether the account has been disabled or not.

If your account hasn’t actually been disabled, it is likely to be file corruption causing Windows to think it is. We can fix that in the registry. As always, be careful when modifying anything in the registry as it can have far-reaching ramifications. If you’re unsure of what you’re doing, right click the registry setting you’re about to change and select Export. Then save it somewhere. If things go wrong, you can import the working registry key to return things to normal.
- Type ‘regedit’ into the Search Windows (Cortana) box.
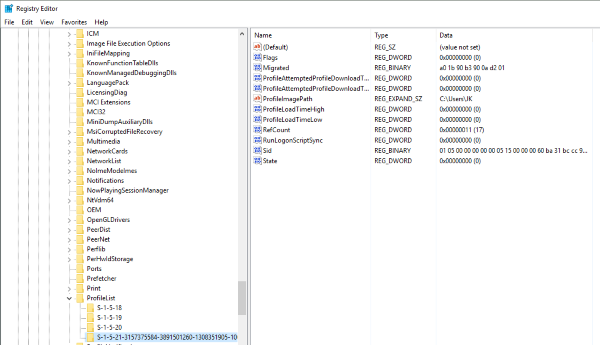
- Navigate to HKEY_LOCAL_MACHINE\SOFTWARE\Microsoft\Windows NT\CurrentVersion\ProfileList.
- Check each S-1-5 folder until you see one that contains your account name. It will usually have a number string after S-1-5.
- Double click RefCount in the right pane and change the value to 0.
- Double click State in the right pane and change the value to 9.
- Reboot your computer and retest.
This should fix any login issues you encounter, including ‘your account has been disabled’ errors. If that doesn’t work, then you will have to create a new user account and copy the files over from your old one. A bit of a pain but your only option from here.


One thought on “How To Fix ‘your account has been disabled’ Errors in Windows 10”